As winter draws in and the temperatures drop, the water pipes in your home can fall victim to old Jack Frost. In just one night of sub-zero temperatures, the water in those pipes can freeze up and leave your taps running dry in the morning. Worse yet, the pressure build-up caused by the water freezing can lead to the pipes bursting and flood your home when the water thaws.
Thankfully, this can all be prevented by simply lagging your pipes. All it takes is the fitting of some cheap foam tubing around your pipes to keep them insulated from the cold. Here’s how to do it.
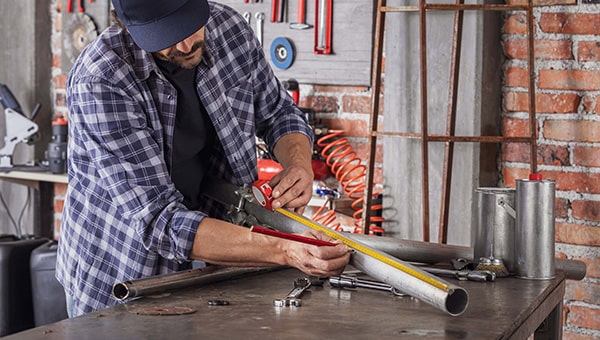
What you will need
Before getting started, you'll want to make sure that you have all of the following items to hand.
- A tape measure
- A pen and paper
- Lagging (a.k.a. pipe insulation)
- A craft knife
- Duct tape
Step 1 - Check how much lagging you will need
This can actually be the trickiest part of the entire process, as some of the pipes in your house most at risk from freezing can be in hard to reach places. Check in the loft, crawl spaces, inside cupboards, under sinks and around appliances (such as your washing machine, boiler or dishwasher) for any exposed pipes you can see...just don’t go taking any risks to do so. You should also check any outbuildings you have (such as a garage), as pipes there are likely to be most at risk.
Any pipes you do find you are going to have to measure. When it comes to lagging, there are three crucial measurements you will need; pipe diameter, pipe length, and clear space around the pipe. These measurements will help determine the bore size, length and wall thickness of the lagging you will need. Matching the length of your lagging to the length of your pipes is a simple case of measuring the length of each pipe with a tape measure, making a note of how many lengths you will need in total (most pipe lagging comes in 1m or 2m lengths), and adding on a little extra just to make sure you have plenty to finish the job. But how do you work out the right bore size and wall thickness?
Bore Size - this simply means the size of the hole at the centre of the lagging through which the pipe will run. To know the bore size you will need, you first need to work out the diameter of your pipe.
How to measure the diameter of your pipe
- Wrap a flexible tape measure around the pipe, ensuring a tight loop
- Make a note of the circumference as shown on the tape measure
- Divide that figure by pi (which is roughly 3.14159) to work out the diameter of the pipe
e.g. if the tape measure says 78.5mm, your calculation should be 78.5 / 3.14159 = 24.9.
This means your pipe diameter is 25mm (rounded to the nearest full mm). In this case, you would need to look for lagging with a bore hole size of at least 25mm.
Important Note: most bore sizes are designed to fit copper or iron pipes, as these are still the most common pipes used in the UK. If you have plastic pipes, you may not be able to find an exact fit for the lagging. If so, make sure that you go to the nearest match that is larger than your diameter(i.e. for a 25mm plastic pipe, you might have to go with a 28mm lagging). Having a bit more room around the pipe is better than it being too tight.
Wall thickness - this essentially how thick the lagging will be on each side of the pipe. If you have lagging with a 25mm wall thickness, for example, it means you will have 25mm of lagging, the bore hole for your pipe, and then another 25mm of lagging around your pipe. Given that the standard diameter of a household water pipe is most likely to be either 25mm or 32mm, your lagging is going to take up quite a bit of space. This is why you need to measure the available space around your pipes, to gauge what thickness of lagging you can install.
As a simple rule of thumb, the thicker the lagging, the better the protection; especially for thinner pipes. However, if you don’t have the space, this can be a problem. Ideally, for maximum efficiency, you’ll want to use lagging with a 25mm wall thickness. If you don’t have the space between your pipes for this though, try to go no lower than a 13mm wall thickness if possible.
Step 2 - Buy the appropriate lagging for your pipes
From the measurements taken in the previous step, you should be able to work out exactly what you need and find the most suitable lagging yourself, either online or in any good DIY store. We offer Davant Foam and Rubber Lagging online for a range of pipe sizes.
Davant Pipe Lagging


If this all seems like too much of a headache, however, the best thing you can do is take your measurements along to your local JDP branch (or any other good DIY store) and ask for help in finding the most suitable lagging for your pipes.
Step 3 - Prepare to fit the lagging
Once you have all the lagging you need, and enough duct tape to match, you’re almost ready to make a start. However, there is one more vitally important thing you must do...turn off your heating and hot water and let your pipes cool down. This way, you’ll not go burning yourself when trying to fit the lagging around your pipes.
Step 4 - Fit the lagging
With your pipes nice and cool, it’s time to get lagging. The job itself is quite straightforward and should go something like this:
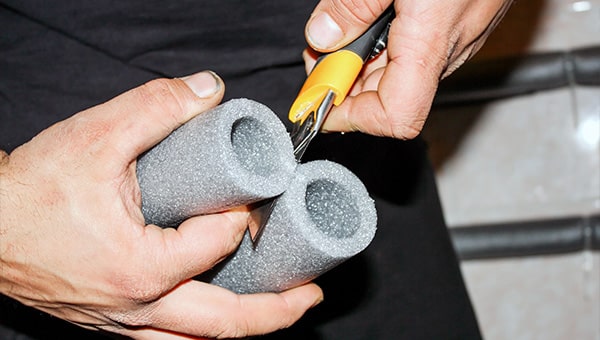
- Use your craft knife to cut the lagging into suitable lengths to match the pipes you want to lag.
- Most lagging will come already split on one side for fitting around your pipes. If yours doesn’t have this split however, you will need to use the knife to cut all the way down one side, into the centre, so that it can be gently prised open to fit over the pipe.
- Open the split, being careful not to prise it open too wide, and push it over your pipe. Squeeze it shut as you go to ensure a snug fit.
- Use your duct tape to seal the lagging every 30cm or so along its length.
- If you have to take the lagging around any joins or bends in the pipe, cut along the width of the tube to allow it to bend and follow the pipe. Just remember to seal any joins or cuts with duct tape for a secure fit.
Repeat this process for all the uninsulated pipes in your house.
Step 5 - Bask in the warmth of a job well done
Once every pipe is suitably tucked up in its own warm winter jacket, turn your heating and hot water back on and relax in the knowledge that the water in your home is now safe from all but the most severe drops in temperature.
For more information about other ways in which you can protect your home against the cold weather, check out our 10 quick tips to winter-proof your home, or our more in-depth guide on how to prepare your pipes for winter, and our advice on how to spot signs of your pipes being frozen and what to do if they burst to help protect your home this winter.
If you have any other questions or need any further advice about your water pipes and how to prepare for winter, contact JDP today. Our technical team is always on hand to help with all of your drainage needs.