We all know that winter is coming, and we all know how harsh the weather can be. But what many of us don’t know is that preparing our homes for the icy temperatures isn’t actually that difficult. There are a number of things you can do yourself to winter-proof your property and ensure that you stay safe and warm during the long, cold nights.
Having your water freeze up over winter is a nightmare. Not only can it leave you without running water for drinking, washing and heating purposes, it can also lead to burst pipes and damaging leaks in your home. For more information about what to do if your pipes do freeze, check out our dedicated article here
In this article, however, we are going to focus on the things you can do to avoid this from happening in the first place. Fortunately, there are a number of simple preventative measures that you can take to protect your home during the cold winter months.
Before we go any further there is a common myth that copper pipes being more likely to freeze than plastic ones, that needs busting.
According to advice on the Water Regulations Advisory Scheme (WRAS) website, the type of material your pipes are made of doesn’t actually have a significant impact on whether the water inside them will freeze or not. All water pipes, regardless of material type, are at risk of freezing in the winter, and all of them can burst if the pressure gets too high. In other words, even if you have plastic water pipes, the advice in this article is still applicable to you.
How to avoid frozen pipes in winter
The following list details 10 simple things you can do to prepare your home for winter and reduce the risk of your water pipes freezing. Let’s start with the most important:
1 - Locate your stop tap
Your inside stop tap (also known as a stop valve or stopcock) enables you to easily control the supply of water into our property. Usually, it will look like a tap without a spout, or a simple lever, that sits between two lengths of pipe. Assuming proper installation, you should be able to shut off your water supply by turning the valve clockwise (to the right) and turn it back on again by turning the valve anti-clockwise (to the left). A nice, simple way to control the water supply in case of an emergency, right? Absolutely...assuming you know where it’s located.
The last thing you want to do if you find a water leak in your home is go hunting around for your stop tap. That’s why making sure you already know where it is located is our first and, arguably, most important tip. In most homes the stop tap will be located under the kitchen sink, so that’s the best place to look. Didn’t find it there? Don’t worry. It’s not uncommon for some properties, especially self-builds and ones that have been extended, to have them hidden away in other locations such as:
- In another kitchen cupboard
- In an airing cupboard
- Under the stairs
- In a downstairs toilet
- In a utility room
- Near the front door
- Out in the garage
If you have exhausted all these possibilities and still can’t find it, it’s probably a good idea to call in a qualified plumber for help. In rare cases, the stop tap could be located under the floorboards, and finding it yourself could turn this simple task into a DIY nightmare.
Note: If you live in a flat or apartment, you may find that there is only a communal stop tap, if you share a water supply with your neighbours, that will usually be located where the supply enters the building. It’s always best to check with your landlord about this and ask who is responsible for using it in case of an emergency.
Once you’ve found your stop tap, it’s a good idea to run a few “emergency drills” throughout the year. Slowly turn your stop tap clockwise, until you can’t turn it anymore, to shut off your water supply. Be careful not to overturn it or use excessive force, as doing so could damage the stop tap. Open up a few taps around the house to help drain the water already in the pipe. This could take a few minutes, but the loss of pressure should quickly become apparent.
If the taps run dry, you can safely say that the stop tap works. Turn the valve anti-clockwise to turn the water back on (again being careful not to use excessive force) and leave the taps open until it starts to run freely again. This may take a few minutes and may come in fits and starts as any air in the pipes gets pushed out.
Repeating this process a few times a year will help keep you prepared for action, should an emergency situation arise, and also help prevent the stop tap from becoming stiff or seizing up entirely.
If you are unable to turn your stop tap, or the water didn’t stop when you did, it’s best to call in a qualified plumber to help fix or replace it for you. Not sure where to find a plumber you can trust? Check out the WaterSafe online directory for a list of plumbers in your area who are qualified to meet the regulations for working safely with drinking water.
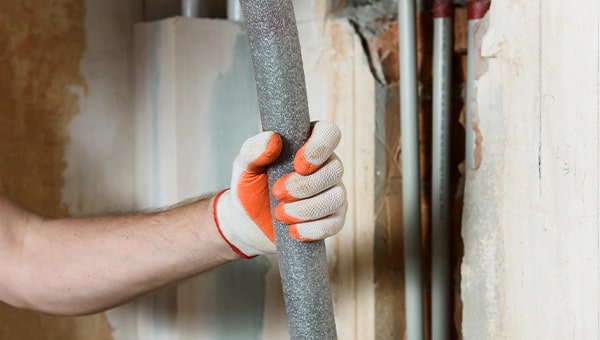
2 - Lag your pipes
Water pipes and freezing temperatures are not the best of friends. Whether they are new or old, copper or plastic, inside out outside, all water pipes have the potential to freeze up and burst when the winter weather sets in.
Making sure that all pipes in and around your property are suitably insulated is one of the best things you can do to protect your property during the winter. This is especially the case in unheated areas, such as lofts and crawl spaces, as those pipes are often situated above any insulation already there and so will be most at risk from freezing. Fortunately, insulating your pipes is quite easy, and relatively inexpensive to do so. All you need is a bit of lagging and a good “how to guide”.
Lagging is basically just a cheap foam or rubber tubing that you can fit around your pipes to insulate them from the cold. Knowing the right thickness required for your various pipes can be a bit tricky, but any good DIY store or drainage merchants, such as your local JDP trade counter, will be able to help you find the right insulation for the job.
As for the good “how to guide”, we thought ahead and prepared one of those for you too. Check out our guide on how to lag your pipes for winter.
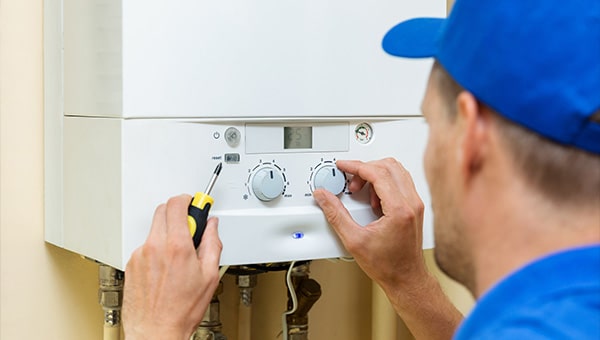
3 - Service your boiler
The colder the weather gets, the more you put your heating on. The more you put your heating on, the harder your boiler has to work. The harder your boiler has to work, the more at risk it is of breaking down. Now, that’s not to say that you need to worry about it every time you turn the heating on (this is, after all, what boilers are designed to do), but it is important to have your boiler serviced annually, by a qualified heating engineer, to prevent breakdowns and ensure it continues to run efficiently.
Ideally, you’ll want to get this booked in before the winter months arrive. That way, should any fault be found, you’ll have plenty of time to get the boiler fixed or replaced before the weather gets too cold to be without your heating.
If you have a combi-boiler or condensing boiler, don’t forget about its condensate pipe... especially if it’s an external one. Make sure that pipe is suitably lagged (see tip 2), ideally with 19mm class ‘O’ grade waterproof insulation, to prevent it from freezing and causing your boiler to shut down.
4 - Leave your heating on low
Most of us will have the heating come on for a couple of hours in the morning, to help ease the pain of getting out of bed when it’s cold, a couple of hours through the day, if we’re home, and then a couple of hours in the evening, to keep us warm while snuggling up on the sofa. But what about the in-between times when we’re out of the house or wrapped up warm in bed? Why don’t we heat the house then? The answer for most of us will be that heating doesn’t come for free. It is an expensive resource that shouldn’t be wasted when there’s no one around to benefit from it..should it?
Well...yes and no. Fuel and money should never be wasted, but you aren’t the only beneficiary of the heating in your home. Whenever your heating is turned off in the winter, your water pipes are exposed to the cold. Inadequate heating is one of the main causes of frozen pipes, and one that can easily be avoided.
Leaving your heating on low (around 14 degrees centigrade is best) during those in-between times will allow the water in your pipes to remain at a constant temperature. When combined with good lagging, this should prevent them from freezing through all but the most extreme drops in temperature.
Caution: if you have a “frost” setting on your thermostat or radiators, don’t rely on it to keep your pipes from freezing. If set too low, there’s a chance they could already be frozen by the time the heating is triggered to come on. Leave your thermostat set to a minimum temperature of 14 degrees centigrade and your radiators on a medium setting to keep your home warm and your pipes frost-free.
If you have an oil, LPG gas or wood-fuelled heating system, make sure that you have enough fuel ahead of time to last you through the winter. Re-supply deliveries may become unreliable during severe weather conditions, so it’s best to try and stay well-stocked. It’s also worth speaking to your fuel supplier to find out if there are any other additional precautions you should take during cold weather periods.
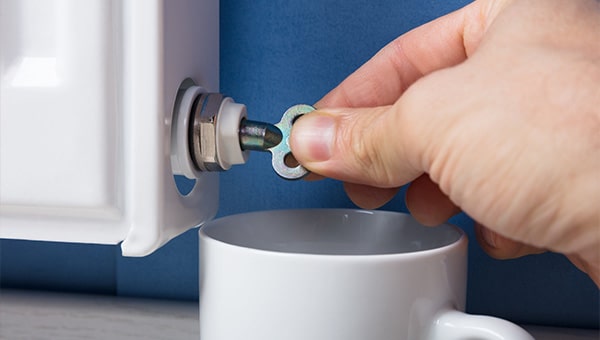
5 - Bleed your radiators
Over time, air can become trapped inside your radiators. When this happens, it can take longer to heat up your home, which can, in turn, put your pipes at greater risk of freezing up. Bleeding your radiators lets the trapped air out and helps to keep them running efficiently. It’s worth doing this a couple of times a year, but especially so in the run-up to winter. You want to have your heating system working at optimum levels when the cold sets in.
Fortunately, like most tasks in this list, bleeding your radiators is a fairly simple task that you can do yourself. All you need is a radiator bleed key (readily available from most DIY stores, if you don’t already have one around the house) and a cloth. Use the key to slowly open the valve at the top of the radiator until you hear the air escape. Keep the cloth held under the valve and wait until a bit of water leaks out before twisting the valve shut again (being careful not to over tighten it). Wipe up any drips of water and move on to the next radiator. Repeat this process with all the radiators in your house to help keep your heating system running smoothly.
6 - Fix dripping taps
A dripping tap, at any time of the year, should always be fixed as soon as possible, as it can waste a surprising amount of water...water that you are still paying for. But this is especially important in the winter months, as a dripping tap can increase the risk of frozen pipes.
Now, you might have heard that it’s actually a good idea to leave one or two taps dripping, if the temperature drops below freezing, as it keeps water flowing through the system and can prevent the pipes from freezing. This is a myth.
If you have followed the other tips in this list, then your water pipes are already as winter-proof as they can be, and any temperature cold enough to get past the lagging is going to freeze the water whether it’s flowing or not. What you actually do when you leave a tap dripping in freezing temperatures, is increase the risk of the water freezing in the tap or the drain, neither of which are likely to be lagged in any way. This can cause blockages, lead to burst pipes and potentially flooding in your home. Do not take this risk.
If a tap is dripping without your consent, it’s most likely because it needs a new washer fitting. This can be a fairly simple thing to fix yourself, and the general steps involved are as follows:
- Turn off the water supply at the stop tap (or the isolation valve under the tap in question if there is one).
- Turn the dripping tap on full
- Put the plugin the sink when the water has stopped flowing
- Find and remove the screw that holds the tap together (this is often hidden inside a handle, or under a lever, behind a cap)
- Remove the tap handle/lever and any cover that might be around it.
- Use an adjustable spanner on the exposed brass spindle or valve to carefully loosen the hexagonal nut
- You should see two washers, one at the top of the spindle and one at the bottom. Replace both, either by taking the spindle to a DIY store to match the right size, or simply picking up an assorted bag of them and finding the ones that fit.
- Once the new washers are in place, reassemble the tap, turn the water back on, and check to see if it has fixed the drip.
The steps above are only a very general guide, however, and may not be suitable for all taps (especially the more expensive ones). Make sure to do your research, find out what type of tap you have and look up the most appropriate way to fix that drip, before getting started.
If you are in any doubt about how to fix your tap, or were unsuccessful in stopping the drip, contact a qualified plumber for help.
7 - Disconnect your garden hose
If you leave your hose pipe connected to an outside tap in winter, two things can happen. First of all, any water left in the pipe can freeze and cause the hose to split. Secondly, and more worryingly, the freezing water can force its way back into your pipes and cause leaks inside your home.
The best way to avoid either of these issues is to disconnect the hose and drain out the water when not in use. If you’re not likely to need it at all over the winter, the better option is to disconnect, drain and store it away, while also fitting an insulating bag over the external tap. If you have an internal shut-off valve to isolate the water supply to the external tap, turn it off and drain the tap before fitting the insulating bag. That way, when the warmer weather returns and you need to use it again, you can rest assured knowing that it should all still be in good working order.
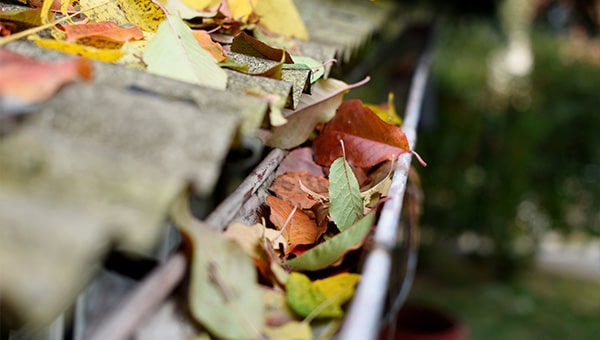
8 - Clear drains and gutters
Blocked drains, gutters, gullies and grids are unpleasant to deal with at the best of times. But when you add freezing temperatures into the mix, it all just gets so much worse. Leaves, twigs, moss and other debris can clog up your gutters and grinds and cause blockages in your gullies and drains that can stop wastewater and surface water flowing from your property. With nowhere else to go, this water may start to back up and overflow into your property, leaving you with a nasty mess to clean up. In winter, however, there’s the added risk that the water might freeze and cause damage to your property and drains.
Needless to say, this is not something you want at any time of year, and keeping your gutters, grids and gullies clean and clear is something you should do regularly, but especially so in the run-up to winter.
For more information about gullies and grids, check out our dedicated article here. For advice on what to do if they get blocked, follow our handy “how to clear blocked gullies” guide.
9 - Insulate your home
While lagging your water pipes will protect them from the cold weather, what about the rest of your house? What’s happening to all the heat you’re paying to pump around your house? It’s probably escaping from your roof, that’s what!
An uninsulated house can lose a quarter of its heat straight out of its roof. To compensate for this, and keep your house toasty warm, your heating system will have to work that much harder which, in return, costs you more money when the bill comes due.
You can save money and still keep your home nice and warm throughout the winter months, by properly installing loft insulation.
Other things you can do to help keep the heat inside your home from escaping are:
- Keep doors shut between rooms
- Use draught excluders on front, back and patio doors
- Draw your curtains early to prevent heat escaping through windows
- Consider having cavity wall insulation installed if possible
While you’re busy thinking about, and hopefully installing loft insulation (if you don’t already have it), spare a thought for your water storage tank/ cylinder. Newer tanks should already be insulated, but if you have an older one in your loft, it could definitely benefit from having an insulated “tank jacket” wrapped around it. Just be careful not to place any insulation directly under your tank though, as this will prevent it from being warmed by the rising heat below.
There is one downside to having all this insulation, however. By working to keep the heat from escaping through your roof, you’ll also be stopping it from keeping your loft warm. Make sure any pipes up there are well lagged and consider leaving the loft door open a little bit, just to allow some heat to circulate.
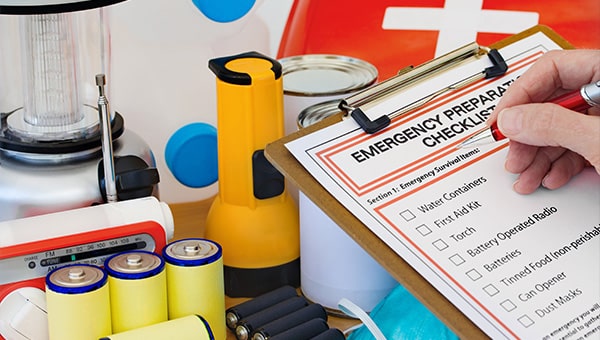
10 - Plan for emergencies
As the old adage goes, if you fail to plan, you should plan to fail, and, in the case of winter emergencies, it rings very true.
Hoping for the best without planning what you would do if the worst happens, is a gamble. Great if you win, but a nightmare if you lose. Having a sound action plan in place for how to deal with a burst pipe in winter will pay dividends should the scenario ever come to pass.
It doesn’t need to be anything complicated, just a simple series of steps that anyone in your household could follow to minimise the potential damage a burst pipe can cause and keep everyone safe. For example:
- Make sure you have suitable insurance and keep the claims line number, and your policy number, in an easy to find location.
- Think about where you and your family could stay and plan how you would get there, if the emergency meant you had to leave your home.
- Have a supply of bottled drinking water in your home, ideally somewhere it won’t also freeze, just in case you're left without water from your taps.
- Keep a supply of ready to eat (tinned) food in case the power goes out or has to be shut off - make sure you have a tin opener as well.
- Store a torch and some spare batteries in an easy to reach location, along with a first aid kit (just in case).
- Keep a list of useful contact numbers to hand, along with a list of any important medication being taken by you or your family (to make sure nothing is forgotten if you have to leave in a hurry).
Note: be mindful that it may not be yourself, but rather a family member or friend needing to find and use these things if you are away or incapacitated.
Advice on how to prepare for emergencies is available online through the UK government guidance for emergencies, at the dedicated ready.scot website for Scotland and the emergency preparation, response and recovery section of the Welsh government website.
If you or a member of your household have any individual needs that may mean you require extra help to prepare your home for winter, it is worth discussing it with your water provider as they may be able to assist you or offer more advice.
So there we have it. Those are the 10 simple things you can do to protect your pipes from freezing and prepare your home for the coming of winter. We hope you found it helpful and informative.
If you have any other questions, or need any further advice about your water pipes and preparing for winter, contact JDP today. Our technical team is always on hand to help with all of your drainage needs.