Channel drains are commonly used to manage water runoff in various outdoor areas such as driveways, patios, and gardens. Proper planning and preparation for installing a channel drain system is essential to ensure effective drainage and prevent water damage.
In this article, we’ll take a look at the key things you need to consider for any channel drain installation before offering a more detailed guide for a domestic driveway channel drain installation – as this is the most common DIY channel drain project we get asked about.
Six steps to planning a channel drain installation
The key to any good DIY project is careful planning and proper preparation. In order to do the job right, you’ll want to:
- Identify the area where you need to install the channel drain. It should be a low point where water tends to pool or where water runoff needs to be directed away from structures.
- Identify a suitable discharge option for the channel drain to connect to so that collected water can drain away.
- Check with local regulations and obtain any necessary permits before starting the installation.
- Measure the length of the area where you will be installing the channel drain.
- Purchase the right channel drain system, including the channel drain, grate, end caps, trash box, etc. Make sure you select a system that is appropriate for your application – see our article “Choosing the right channel drain for your project” for guidance on this.
- Ensure you have the right tools and materials for the job. Keep in mind that different surface materials will require different tools;
- If you are installing the channel drain in tarmac or concrete, you will need to rent a concrete saw to cut a trench for the channel drain.
- If you are installing the channel drain in block paving, you can use a paver lifter or hammer and cold chisel to remove the blocks in the area where you will be installing the channel drain.
Now, let’s take these key steps and tailor them for a domestic driveway channel drain installation to give more detail.
1. Where to install channel drain on a driveway
A typical driveway will either slope down towards your property (often a garage) or down towards the road. In either of these cases, the best place to install the channel drain is at the bottom of the slope, as it will naturally direct excess surface water runoff into the drain to prevent it from flooding your property or the road. For seemingly flat driveways, however, it can be more challenging to select the best location. You’ll need to consider where the water pools most when it rains. Check out our article on the “most common drainage problems on your driveway” for more advice on this.
It is important to ensure you understand the requirements of your chosen installation area. While the general process of installing channel drains will always be the same, some unique considerations are required depending on whether you are installing in tarmac, concrete, or block paving. Here is a quick explanation of each:
Installing channel drainage in tarmac
Tarmac is a hot mix of asphalt that is poured and rolled into place. It is a relatively durable surface, but it can be susceptible to cracking and damage from heavy loads.
With the right tools, installing a channel drain in a tarmac driveway is reasonably easy, though it is essential to cut the tarmac carefully to avoid damaging it. Once installed, you will need to use a sealant to prevent water from seeping into the tarmac around the drain.
One important consideration to keep in mind is that, unless you plan to mix up a fresh batch of tarmac to fill back around the channel drain once it is installed, you’ll likely be setting the drain in place with concrete, which will further break up the look of your driveway. For this reason, you’ll probably want to be a lot more accurate with the size and cutting of your trench.
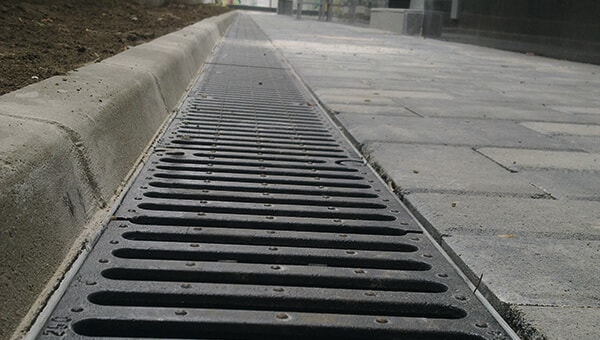
Installing channel drainage in concrete
Concrete is a durable and long-lasting surface that is ideal for driveways, even if it’s not always considered to be the most decorative option. Installing a channel drain in a concrete driveway is also relatively easy with the right tools, as you will simply need to cut a trench to the size of the drain and then set it in place. You can then pour concrete around the channel drain to secure it.
Because you are refilling the gaps around the channel drain with more concrete, the finished look of the driveway will be a lot less broken up. For this reason, you can make your trench a bit wider to give yourself more room to work without too much worry.
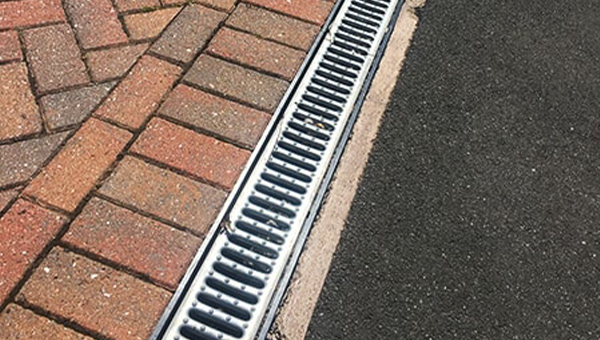
Installing channel drainage in block paving

Block paving is a driveway surface made up of individual blocks that are laid in a pattern. It is a durable and attractive surface, but it can be more difficult to install a channel drain in a block paved driveway than in a tarmac or concrete driveway.
To install a channel drain in a block paved driveway, you will need to remove enough blocks from the install area to create a trench for the drain. You will then need to cut the blocks to fit back around the drain and then re-lay them.
This is probably the most tricky out of the three installation types, but it does give a very neat finish if done right.
Can you install Channel Drainage in Gravel?
A gravel driveway consists of a loose but dense distribution of small stones or rock chippings. While it is technically possible to install channel drainage in a gravel driveway, it is generally not recommended. Gravel driveways are designed to allow water to percolate through the gravel and into the soil below. Channel drains can interfere with this natural drainage process and can also cause problems with the gravel surface.
Instead of using channel drains, gravel driveways are better served by a French Drain or Land Drain system. This is a subsurface drainage system that directs water away from the driveway and into a pipe that can be connected to a surface water drainage pipe or other drainage outlet.
2. Where to connect the driveway channel drain outlet
A crucial aspect of driveway channel drain installation is ensuring proper connection to an effective drainage system. This ensures efficient water removal and prevents pooling or flooding. Two primary options exist for connecting your channel drain outlet:
Connecting channel drainage to a surface water drain
A surface water drain is the most common and preferred connection method for driveway channel drains. It's a network of underground pipes specifically designed to collect and transport surface runoff from impervious surfaces like driveways, patios, and paths. Connecting your channel drain outlet to a surface water drain offers several advantages:
- Direct Drainage: Water collected by the channel drain is directly conveyed to the surface water drain, minimising the risk of pooling or overflow.
- Existing Infrastructure: Most properties in the UK have an existing surface water drain system, making it a convenient and cost-effective option.
- Environmental Compliance: Connecting to a surface water drain ensures proper treatment and disposal of rainwater, adhering to environmental regulations.
How to locate a surface water drain
Surface water drains around your property will usually run along the foundation of your house and then out towards the road, where they will connect to the main drain line. However, unless you have a manhole cover in your yard, which would indicate the presence of an inspection chamber, it can be difficult to detect where the drain pipe runs underground. To help in this situation, here are a few things you can do:
- Consult property plans - If available, refer to your property's drainage plan or architectural drawings for the location of the surface water drain.
- Check the downpipes from your gutters - Downpipes will typically either connect directly to the surface water drains or discharge into gullies/grids.
- Check the gullies and grids - Any gullies or grids around your property will most likely connect to the surface water drains.
- Contact your local council - If you're still unsure, contact your local council's planning department. They may have records or maps indicating the location of surface water drains in your area.

If you are in any way unsure about where your drains might be, consult with a professional.
Connecting channel drainage to a soakaway system
A soakaway system is an alternative option for connecting your channel drain outlet, particularly if a surface water drain is unavailable or unsuitable. A soakaway can be something as simple as a gravel-filled pit that helps surface water drain away or a series of cellular crates designed to absorb and disperse surface water into the ground more effectively.
If you have an existing soakaway on your property, you shouldn’t need to seek permission to connect to it. If you're considering installing a new soakaway system, however, make sure to check with your local council for regulations and suitability. Soakaway systems can affect groundwater levels and may also impact neighbouring properties, so the council may have specific requirements for soakaway depth, size, and distance from buildings that you would need to follow. Our “Do’s and Don’ts when installing a plastic soakaway” article has some helpful information to get you started, though.
Can you connect a channel drain system to a sewage pipe?
Connecting your channel drain system to a sewage pipe is generally not recommended. Doing so would introduce rainwater and surface water into the sanitary sewer system, which is designed for wastewater from toilets, sinks, and other household appliances. Diverting rainwater into the sewage system can overload the system and cause potential environmental issues.
Some properties will have a combined drainage system where surface water and wastewater pipes all flow into the sewer mains. However, even in this situation, you should still connect your channel drain to a surface water drainage pipe and not a waste pipe or the main sewer pipe for health and safety reasons - if the pipe might carry poo, it’s not the one for you.
Proper connection to a suitable drainage system ensures the effectiveness of your channel drain and protects your property from water damage. So, if you're unsure about any aspect of the installation process, consulting a qualified drainage professional is always advisable.
3. Permissions needed to install driveway channel drainage
Channel drainage is a common method of collecting and directing surface water runoff from driveways. If you plan to install channel drainage on your driveway, you will need to consider the following permissions:
- Planning permission - If your driveway is new or you are modifying an existing driveway to install channel drainage, you may need planning permission. This depends on the size and location of the driveway and the type of channel drainage you are using. In general, if the area of the driveway is less than 5 square meters, you likely won’t need planning permission.
- Building Regulations - You will need to comply with the Building Regulations, which ensure that the channel drainage system is properly designed and installed to prevent surface water from pooling or running off onto neighbouring properties or public roads.
- Water discharge consent - If you are discharging surface water from your driveway into a public sewer or watercourse, you may need a water discharge consent from your local sewerage undertaker or environmental regulator.
It is always advisable to check with your local planning authority and sewerage undertaker before installing channel drainage on your driveway to ensure that you have the necessary permissions.
4. Measuring your driveway for a channel drain system
You need to measure the size of your driveway for two reasons. Firstly, you need to know whether the total area of your driveway is under or over 5 meters square (most average driveways will be over), as this will inform whether you need planning permission for your project or not, as mentioned above. Secondly, you need to know how many lengths of your chosen land drainage you will need to buy.
To work out the square meter area of the driveway, you simply need to measure the length and multiply it by the width. Take two or three measurements for each, either side, either end, and in the middle, then use the largest measurements for your calculation (better to slightly overestimate than underestimate).
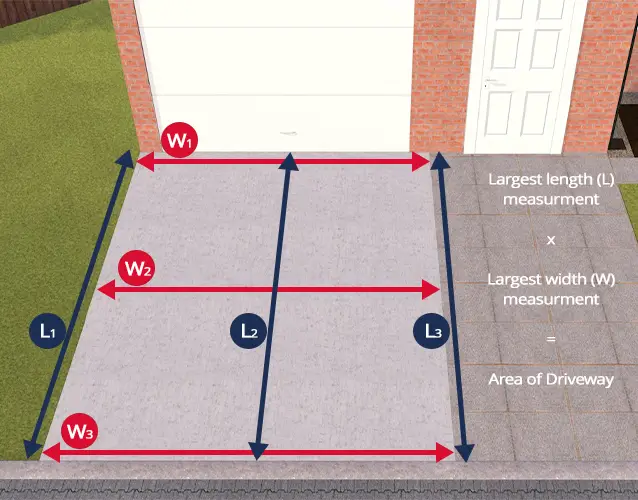
If one of your width measurements is from where you intend to install your channel drainage, you can use this figure to work out how many channel lengths you will need. If not, take another measurement at the chosen location. Typically, most channel drain lengths are sold in one-meter lengths, so make sure you round up your width measurement to the nearest full meter for ease.
In addition to measuring the driveway, you’ll also need to measure the distance between the planned outlet end of the channel drain and the location of your surface water drainage or soakaway connection. This measurement will help you work out the amount of pipe lengths and fittings you will need to connect the systems together.
5. Choosing the right channel drain for your driveway
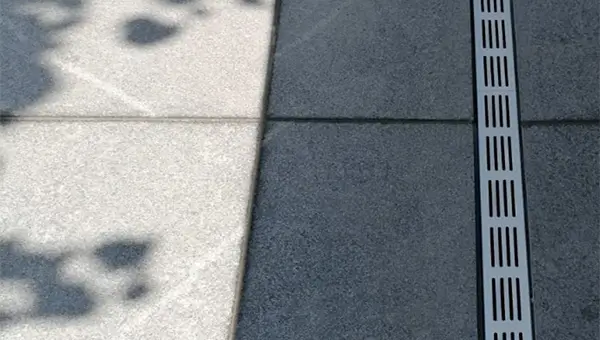
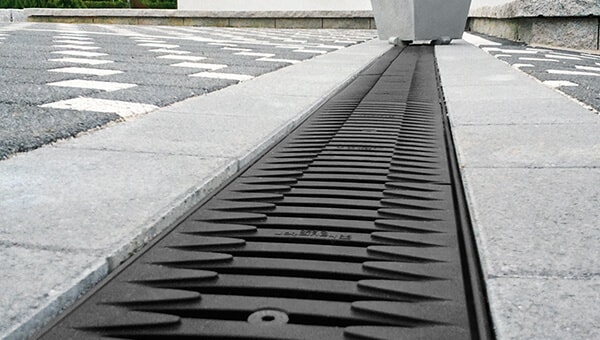
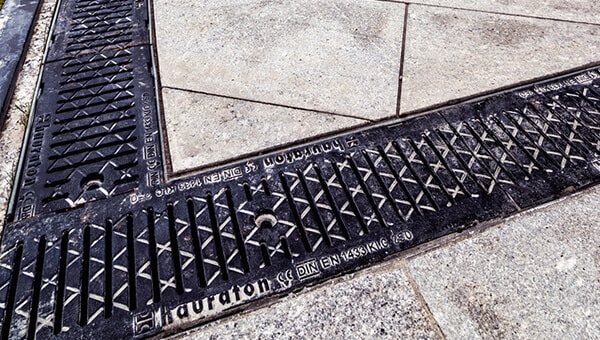
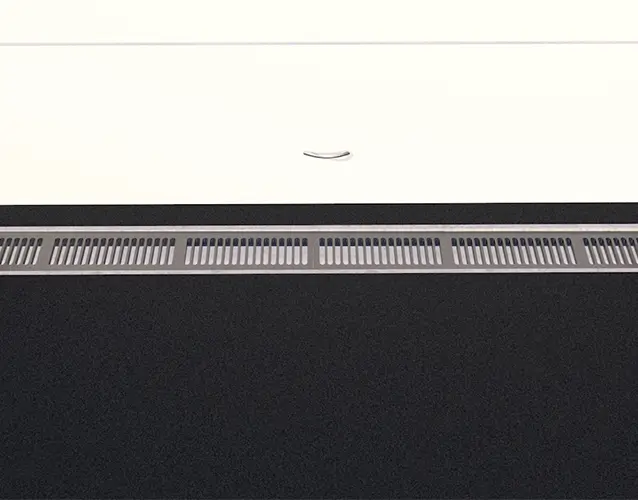
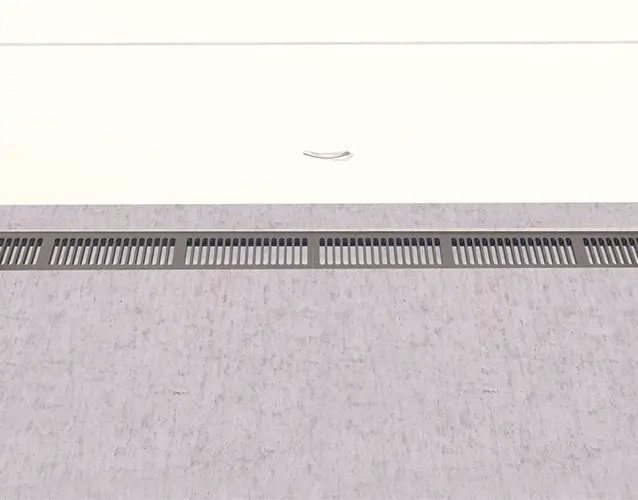
Once you have all your measurements, you’ll be able to shop around for a suitable channel drain system. For a domestic driveway, you’ll need one with a load-bearing rating of either A15 Trafficable or B125 as a minimum. Any material type will be suitable as long it states one of these load ratings, and a standard grating should be fine unless you live in an area prone to large and frequent quantities of leaf litter, in which case you might want to consider a grating with smaller openings. If you are installing your channel drain in block paving, you could also consider Slot Channel Drains for a much neater finish.
Hauraton TOP X Channel Drain Multipacks - Ideal for Driveway installations
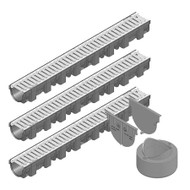

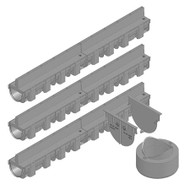
Regardless of your material and style choices, a typical channel drain system will be comprised of
- Channel drain lengths – the main body of the channel drain.
- Channel drain grates – to allow water to flow into the channel while offering varying levels of protection against debris.
- Channel drain end cap – to block off any open ends.
- Channel drain outlet end cap - for connection to a drain level with the channel.
- Channel drain trash box – to offer additional protection against debris entering the pipe work.
- Drainage pipe & fittings – to connect the channel drain outlet to the surface water drain or soakaway.
A typical driveway in the UK will usually be at least 3 meters wide to accommodate a single car. For this, you would need three channel lengths, six gratings (if they aren’t supplied with the channel body), two end caps (or one end cap and one outlet end cap if you plan to make a lateral connection to your drainage pipe), a trash box (if you want extra protection from debris for your drains), and then however many lengths of drain pipe and fittings required to connect up to the nearest surface water drainage pipe.
For more help and advice about channel drain load ratings, check out our “Choosing the right loading class for your channel drain application” article, and for help selecting the right system, have a read of our “Choosing the right channel drain for your project” article.
6. Tools and Materials needed to install driveway channel drainage
Installing channel drainage in your driveway can be a fairly simple job…if you have the right tools. Below is a list of all the things you will likely need throughout the installation.
Protective Clothing
As with any DIY project, it is important to put safety first and make sure you have and use the proper personal protective equipment. For installing driveway channel drainage, you’ll need the following:
- Work Gloves – to protect your hands from sharp edges and splinters when working with plastics, metals, and concrete, prevent hand fatigue and injuries, such as tendonitis and carpal tunnel syndrome, and enhance grip and control when using tools and materials.
- Safety Glasses – to shield your eyes from flying debris, prevent eye strain and irritation from dust and dirt, and guard against chemical splashes if you're using any chemicals or sealants during installation.
- Dust Mask – to protect your respiratory system from harmful dust particles (especially when cutting concrete or asphalt) and prevent allergic reactions to dust or other airborne irritants (if you suffer from them).
There are four distinct stages to a channel drain installation – Excavation, Levelling, Installing, and Backfill & Finishing, and each stage requires different things.
Tools needed for excavating a channel drain trench
The first task is to dig a trench in your driveway in which the channel drain will be installed. Here is a list of tools that will likely be needed to excavate a channel drain trench:
- Tape Measure - an essential tool for accurately measuring the length, width, and depth of the trench to accommodate the channel drain system. Precise measurements are crucial for ensuring the channel drain fits properly and functions effectively.
- String & Stakes (or alternatives) - used to mark the outline of the trench, ensuring a straight and level excavation. Proper marking prevents deviations during excavation and ensures the trench aligns with the desired drainage path.
- Concrete Saw - specifically designed to cut through hard surfaces like concrete or tarmac, allowing you to create a clean and straight trench. If your driveway is paved with concrete or tarmac, this is essential for creating the trench without damaging the surrounding surface.
- Paver Lifter or Cold Chisel & Mallet - A paver lifter is a specialised tool designed to lift and remove block paving stones efficiently. If you can’t source one of these, a cold chisel and mallet can be used instead to carefully pry up individual paving stones. If your driveway is paved with block paving, these tools will be essential.
- Pickaxe – used to break up and remove hard compacted soil or hardcore beneath the surface layer to allow for deeper trench excavation.
- Shovel & Trowel – a shovel and trowel are essential for excavating the trench and preparing the base for proper channel drain installation. A shovel will be needed to remove soil or rubble, and a trowel is needed for finer tasks like levelling the trench base and backfilling around the channel drain.
Tools needed for levelling a channel drain trench
After excavating the trench, it's crucial to create a level bedding to provide a stable and supportive base for the channel drain. This ensures proper drainage and prevents any settling or movement of the drain over time. Here's a list of recommended tools and materials for creating a level bedding:
- Concrete Mix – if the trench you dig exposes soil beneath the driveway, a concrete mix can be used to create a solid base for the channel drain to sit on. Concrete is also needed for side fill around the installed channel drain to provide structural support and prevent it from shifting.
- Mixing Bucket – used to mix the concrete with water to create a consistent and workable slurry.
- Tarpaulin – used to protect the ground from concrete mix spills and prevent staining or damage.
- Sand or Gravel - serves as a bedding material that compacts well and provides a stable base for the channel drain to rest on.
- Compactor – used to compact the bedding materials (sand and concrete mix) to create a solid and stable base. This will also be needed for compacting backfill material, too.
- Spirit Level – used to check the horizontal alignment of the bedding material, ensuring a level surface for the channel drain.
Tools needed for installing a channel drain
Once the trench is excavated and a level bedding is prepared, it's time to install the channel drain. Here's a list of essential tools for this stage:
- Angle Grinder – used for cutting and grinding hard materials like concrete or metal. An angle grinder is essential when installing concrete channel drains to ensure that any cuts made to adjust the length are clean and precise.
- Hacksaw – used to adjust the length of plastic channel drain as well as for cutting PVC pipes to connect the channel drain to the existing drainage system.
- Pipe Solvent Cement – used to ensure a watertight and leak-proof connection between the channel drain outlet pipes and the existing drainage system. This will only be needed if using PVC pipes and fittings that require solvent weld connection.
- Silicone Sealant – used to fill gaps and seal joints in the channel drain system to provide a watertight seal.
- Screwdriver or Hex Key - depending on the channel drain grating type, one of these will be needed to separate the grating from the channel.
Tools needed for backfilling and finishing off a channel drain installation
After installing the channel drain, it's crucial to backfill the trench and restore the driveway surface, ensuring a proper and aesthetically pleasing finish. Here's a list of tools and materials for this stage:
- Backfill Material – used to fill the trench around the channel drain and restore the driveway surface. Backfilling material typically consists of gravel, sand, or compacted soil.
- Loam or Topsoil – used to replace the excavated material and provide a level and aesthetically pleasing finish. This might be needed if installing channel drain between your driveway and garden.
- Concrete Mix (if resurfacing a concrete driveway) – used to create a new driveway surface around the channel drain that blends with the existing surface.
- Formwork (if resurfacing a concrete driveway) – used to create a mould for the new concrete surface. Typically made of wood or plastic planks, formwork provides a consistent shape and thickness for the concrete surface, ensuring a smooth and level finish.
- Trowel and Edger (if resurfacing a concrete driveway) – a trowel is used to smooth and level the freshly poured concrete surface, while an edger creates a defined edge between the concrete and the surrounding areas.
- Tarmac Mix (if resurfacing a tarmac driveway) – used to create a new driveway surface around the channel drain that blends with the existing surface.
- Rake (if resurfacing a tarmac driveway) – used to level the tarmac mix and smooth out any bumps or ridges.
- Tamper - used to compact the backfill and resurfacing materials, eliminating air pockets and preventing settling to ensure an even finish and long-term stability.
- Sealant or Protective Coating (if desired) – can be applied to the finished surface to enhance durability, water resistance, and aesthetic appeal.
This may all seem like quite a lot to digest, but with proper planning and preparation, installing a driveway channel drain system yourself can be a relatively straightforward project. Take a look at our “How to install a channel drainage system” article for a step-by-step guide to a typical driveway channel drain installation. Together with this planning guide, it should help you decide whether this is something you feel comfortable taking on yourself or if you’d be better off calling on the skills of a professional tradesperson for.
And that’s it for our guide to planning and preparing for a channel drain installation project. Once you feel ready to purchase your channel drain system, head over to our Channel Drain section, where we have a comprehensive range of Hauraton products available for all loading classes.
If, however, you feel that you need more information before you go any further, we have a whole series of other channel drain articles available to help. Alternatively, you can contact our team of experts, who are always on hand to help with all of your civils and drainage needs.