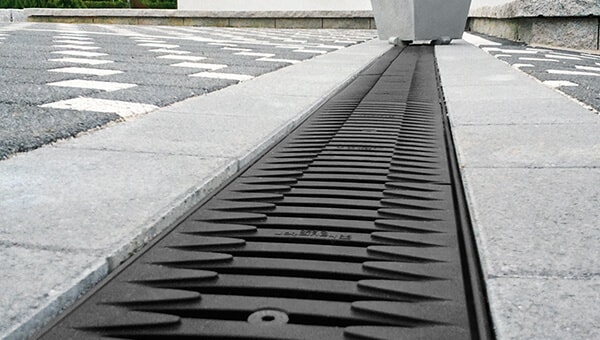
Channel drains play a crucial role in managing stormwater runoff, preventing flooding, and maintaining healthy pavements. However, over time, channel drains can accumulate debris, leading to blockages and reduced efficiency. The good thing about these types of drains, however, is that you can remove the gratings and clean them yourself.
A well-maintained channel drain system is crucial for effective water management and prevention of potential damage caused by poor drainage. Whether installed in driveways, patios, or gardens, regular maintenance can extend the life of your channel drain system and keep it functioning smoothly. In this guide, we'll explore the key steps to maintain your channel drain system, prevent blockages, and ensure optimal performance.
We’ll start with a quick guide and then go into more step-by-step details later on.
Seven quick tips for maintaining a channel drain system
1. Regular Cleaning
Regular cleaning is the cornerstone of channel drain maintenance. Debris, leaves, dirt, and other materials can accumulate in the drain, obstructing water flow and causing blockages. Here's how to clean your channel drain system effectively:
- Frequency - Aim to clean your channel drain system at least once every few months – may need to be more frequent during the autumn when leaves are falling.
- Tools - Use a broom, brush, or a specialised drain cleaning tool to sweep away debris from the grate's surface and the interior of the channel.
2. Grate Maintenance
The grate on your channel drain is vital in preventing debris from entering the drainage system. Proper grate maintenance is essential:
- Inspect Regularly - Check the grates for any damage, rust, or wear. Replace damaged grates promptly to prevent debris from entering the drain.
- Cleaning - Remove and clean the grates thoroughly. Use a hose or a brush to remove stubborn dirt and residue.
3. Clearing Blockages
If you notice slow water flow or standing water, it's likely that a blockage has formed. Address blockages promptly to prevent further issues:
- Use a Plunger - If the blockage is near the surface, a plunger can often dislodge it. Apply gentle pressure and plunge a few times to clear the debris.
- Drain Snake - For deeper blockages, use a drain snake to reach and remove the obstruction.
4. Flushing the System
Regularly flushing your channel drain system with water can help prevent the build-up of sediments and dirt, ensuring smooth water flow:
- Hose Flush - Use a garden hose to flush the system thoroughly. Start from the higher end of the drain and work your way down, pushing debris toward the outlet.
5. Vegetation Management
Vegetation can contribute to blockages as roots seek out water sources. Manage nearby plants and trees to prevent root intrusion:
- Trimming Regularly trim back plants and shrubs that are in close proximity to the channel drain system.
- Root Barriers - Consider installing root barriers between the drain and nearby vegetation to deter root growth toward the drain.
6. Professional Inspection
Periodically, it's wise to have a professional inspect your channel drain system, especially if you're experiencing recurring blockages or slow drainage:
- Scheduled Inspections - Schedule a professional inspection every year or as needed, depending on the system's usage and local conditions.
- Expertise - A professional can identify potential issues, recommend repairs, and perform maintenance tasks that require specialised tools.
7. Winter Preparations
In colder climates, taking steps to winterise your channel drain system can prevent freezing and damage:
- Remove Debris Clean the system thoroughly before winter to prevent frozen debris from exacerbating blockages.
- De-Icing - Prevent the channels or gratings from freezing up by using salt-based de-icing products.
Okay, so, those are our seven quick tips for maintaining a channel drain system. Now, let’s look at a few of them a bit more closely for those who need more detailed advice on what to do.
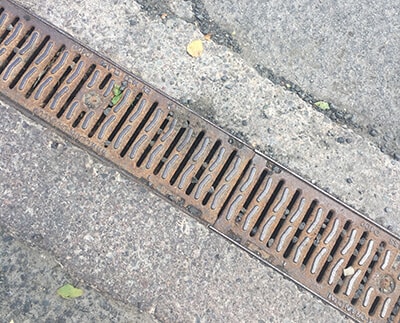
How to lift channel drain gratings for cleaning
Often, the biggest challenge when cleaning channel drains, if this is your first time doing it, comes from trying to figure out how to remove the gratings. Since most of the cleaning and maintenance tips mentioned in this article will require the removal of the channel drain gratings, we figured this was a good place to start.
The method for removing a channel drain grating can differ depending on which channel drain you have. However, for the type of gratings commonly found in domestic driveways, which will typically be made from plastic or steel, removing them tends to be fairly simple once you know what you are doing. The following steps should be relevant for most driveway channel drains:
- Locate where the grate is fixed to the channel – this will normally be a small screw, latch, or handle that allows for easy removal of the grating, typically positioned at the centre or one side of the grating (may be concealed beneath a cap or cover).
- Unlock the grating – Depending on the type of mechanism, you may need to use a screwdriver, pliers, or other tools to unlock it.
- Find where that grating ends – this will be a small gap where one length ends and another begins.
- Lift the grating – Using a small screwdriver or similar, slowly wedge it in the gap and begin to lift the end. Once you have it lifted, you then need to grab a larger tool, or even a length of wood, and carefully, so as not to snap the grating, begin to push down, lifting the end until the grating pops off.
How to clean a channel drain system
Regular cleaning is essential to keep channel drains functioning properly. To clean the channels, follow these steps:
- Unlock and remove the grating – Locate and unlock the grate locking mechanism (screw, latch, or handle), then gently lift the grating to detach it from the channel.
- Inspect the grating for damage - Check for cracks, dents, or loose fasteners that could compromise the grating's integrity. Replace damaged gratings promptly to prevent further problems.
- Clean the channel - Remove any accumulated debris, such as leaves, twigs, or pebbles, using a broom, shovel, or dustpan. For stubborn debris, use a drainage hook or a sturdy clothes hanger.
- Flush the channel with water - Use a garden hose or a pressure washer to flush out any remaining debris or silt from the channel.
- Clean the grating - Brush or wash the grating to remove any dirt, grime or loose debris from the grating surface.
- Reinstall the grating - Once cleaned, reposition the grate, ensuring it is properly aligned, and apply some pressure to the snap-on fitting; standing on it will usually work.
How to prevent channel drain blockages
To extend the lifespan and maintain the efficiency of channel drains, incorporate these preventative measures:
- Regular Cleaning - Establish a regular cleaning schedule, such as quarterly or monthly cleanings, to prevent debris build-up and blockages. This will help you identify any potential problems early.
- Assess the Grating - If you find your existing channel drain system becomes too easily clogged with debris, consider changing the type of grating installed to one with smaller openings. This may help filter out more blockage building material but may require more regular grating maintenance to maintain efficient drainage capacity. Read our guide to channel drain materials and gratings for more on this.
- Clear Surroundings - Keep the area around channel drains free of debris, plants, or obstacles that could obstruct water flow.
- Regular Inspections Conduct regular inspections of the channel drain system to identify any potential issues, such as cracks, damage, or misalignment, that could lead to leaks or blockages.
- Upkeep and Replacement - Maintain the integrity of the channel drain system by promptly addressing any signs of wear or damage. Replace worn or damaged components as necessary. Most modern systems are made from long-lasting materials…but nothing lasts forever.
How to clear channel drain blockages
Blockages are a common cause of channel drainage issues. To clear a blockage, follow these steps:
- Remove the Grate(s) - Follow the steps outlined in the previous section to remove the gratings and access the channel.
- Identify the Cause of Blockage - Once the grating is removed, examine the channel for the source of the blockage. Look for areas where water pools or slows down. Common culprits include leaves, trash, gravel, and sand.
- Remove Debris Manually - Use a hand shovel, wire brush, or similar tool to carefully remove the accumulated debris causing the blockage.
- Utilise a Drainage Rod - If debris is stuck deep inside the channel, use a drainage rod or a drain snake (a sturdy clothes hanger can work in a pinch) to reach in and pull it out.
- Flush the Channel - Once the blockage is cleared, use a hose or pressure washer* to flush out any remaining debris and sediment.
- Reinstall the Grate(s) - Once the channel is clear and dry, reinstall the gratings following the securing instructions.
*Note: If you have plastic channel drains, be careful not to blast them too much if using a pressure washer, as this could damage them. A gentle pressure should clean the channels out enough to be functional.
Recommended yearly channel drain maintenance & cleaning schedule
Establish a regular maintenance schedule to ensure optimal drainage performance throughout the year. A recommended yearly schedule includes:
- Spring Cleaning - Conduct a thorough cleaning of all channel drains to remove debris accumulated during the winter months.
- Summer Inspections - Perform routine cleaning of channel drains every two to three months during the summer to prevent debris build-up, maintain efficient drainage, and inspect for any signs of blockages or leaks.
- Autumn Preparation - Repeat the thorough cleaning in the Autumn to remove leaves, twigs, and other debris that accumulate during the autumn season. This will help to prepare your channel drain system for the increased winter runoff.
How to prepare channel drains for winter
To protect channel drains from freezing and blockages during winter, follow these steps:
- Clean the channels thoroughly - Perform a final cleaning of all channel drains to remove any loose debris that could freeze and obstruct the flow of water.
- Apply de-icing agents - Spray or spread de-icing agents on the grating and surrounding areas to prevent snow and ice from sticking. Try to avoid using harsh de-icing chemicals that can damage the system and opt for salt alternatives that are less corrosive instead.
- Clear Snow and Ice Promptly - Remove any snow lying on and around the gratings and check the channels periodically for any ice build-up or blockages that could impede proper drainage.
Proper maintenance is essential for the longevity and efficiency of your channel drain system. By following these steps and establishing a regular maintenance routine, you can prevent blockages, ensure optimal water flow, and enjoy a drainage system that functions effectively for years to come. Remember that consistent care can save you time, effort, and potential repair costs in the long run.
If you have any questions or need further advice about cleaning or maintaining your channel drainage system, contact JDP today. Our team of experts are always on hand to help with all of your civils and drainage needs.