Off mains drainage is a serious business. Those of us living in towns and cities often take it for granted that our wastewater simply disappears when we flush a chain or pull a plug. However, in more rural areas, where connections to the main sewer system can often be impractical, costly, or straight up impossible, private off-mains systems are often necessary. One of the most common options in such situations, comes in the form of septic tanks.
If you are buying a new build house that requires an off-mains system, this will most likely have been taken care of by the builders already, and you need only concern yourself with the running and maintenance of it. But what if you are moving into an existing property that requires one, or you are the owner of an older off-mains system that needs replacing? Can you install a septic tank yourself? These are the questions that this guide will attempt to answer.
Note: This article assumes that you are fully aware of all the off-mains solutions available to you and that you have chosen a septic tank to be the most suitable. If you are unsure about any of this, we recommend first taking a look at our guide to off-mains drainage article.
Installing a Domestic Septic Tank
When it comes to installing a septic tank, going down the DIY route is a popular choice due in no small part to the potential cost savings. Hiring a specialist contractor will likely cost you somewhere between £150 and £250 per day (sometimes more, depending on the location and conditions of the site), and it can take up to a week of work to install some of the larger systems. However, unless you have a mini excavator to hand, and have at least some plumbing skills and experience, we would highly recommend factoring this cost into your plans.
If incorrectly installed, an off-mains sewage system can leave you in a nasty mess; both physically and legally. Hiring a professional contractor to do the installation for you is the best way to give peace of mind that your system is suitable for your needs, reliable and legally compliant. Wrong installation is often the cause for the majority of septic tank drainage issues.
However, if you have the skills and experience to install one yourself, the following guide will take you through various steps and stages involved in planning and preparing for your installation.
Note: This guide is intended as a recommendation of points to consider when planning to install a septic tank system. It is not intended to be taken as legal advice, nor does it cover all aspects of installation for all types of septic tanks. Professional advice should always be sought to better understand the legalities of installing your system, and manufacturers recommendations and guidance should always be taken over those mentioned in this article, should they conflict in any way.
Stages of installing a septic tank
If you have already read our "How to plan and design a new septic tank system" article, you'll no doubt have become an expert on all the legalities, requirements and rules surrounding the installation of a domestic septic tank system (if not, we highly recommend giving it a read before going any further). You will have designed your system to perfectly fit your property, while remaining fully compliant with rules and regulations, and have placed an order for the most suitable tank. Now comes the hard work...installing it all!
Once again, we do recommend that the installation of any septic tank should always be carried out by a suitably trained and qualified professional. However, if you feel you are up to the task of a DIY install, the manufacturer of your chosen tank will provide you with a detailed manual that will give step by step instructions on how to do it. This will also advise you of all the health and safety measures that should be taken throughout - please make sure you follow these in full.
As a brief guide, though, the following list of the general steps should give you an idea of what will be involved.
Step 1 - Make sure you are prepared
Upon delivery of your septic tank, the following checks should be carried out before installation can begin:
- Inspect tank for damage - Tanks will normally have been fully tested and checked before being dispatched to you, but it isn’t uncommon for them to become damaged during transportation and offloading. Make sure to thoroughly inspect the tank when it arrives as, once the tank is installed, most manufacturers won’t accept claims for damage.
- Check you have corect invert depths - you should have already checked the depth of your incoming pipework during the site survey and design stage of your project, and ordered a tank with the appropriate invert levels. However, it is worth checking this again to ensure that the physical tank delivered will still connect to your existing pipework and remain within the maximum permissible depth.
Once this is done and you are happy with the condition of the tank, it is advisable to do the following before beginning your installation:
- Read the full installation guide provided by the tank manufacturer.
- Ensure that you have the correct Building Regulations approval.
- Ensure consent of discharge has been received from the environment agency.
- Have a pump available to keep excavation clean and free from rising ground water during installation.
Assuming everything is in order, you should also double check that your plans include consideration for the following:
- Ventilation arrangements - this can often be overlooked, but it is important to ensure your system is well vented to prevent odour issues on site. Contact our technical team for advice if you are unsure of the best arrangements for your site.
- Siting the tank - double check your planned install location against the guidelines in the install manual, as they may recommend extra conditions and minimum distances specific to their tank.British Standard BS: 6297-1983 recommends the following:
- The tank should be as far away from habitable buildings as is economically practicable.
- The direction of the prevailing wind should be considered in relation to any properties.
- Allow for sludge emptying vehicle’s have a maximum reach of 30 metres, but the depth from the ground level to the bottom of the tank must not exceed 5 metres.
- The installation should be carried out in accordance with the requirements of the Construction and Building Regulations.
- An inspection chamber should be installed upstream of the Treatment Plant. For discharge quality sampling purposes, a sampling chamber can often be provided (optional extra).
Once you are satisfied with all of the above, it’s time to grab your shovel (or digger if you want to save yourself the back breaking work).
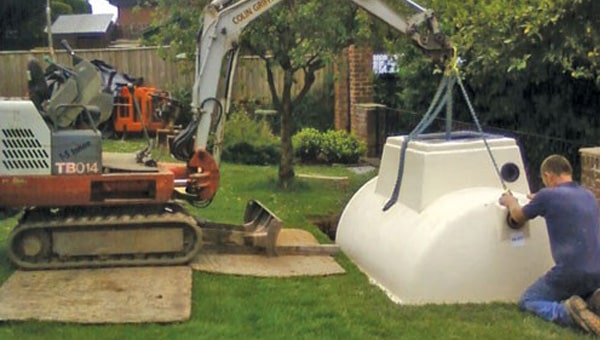
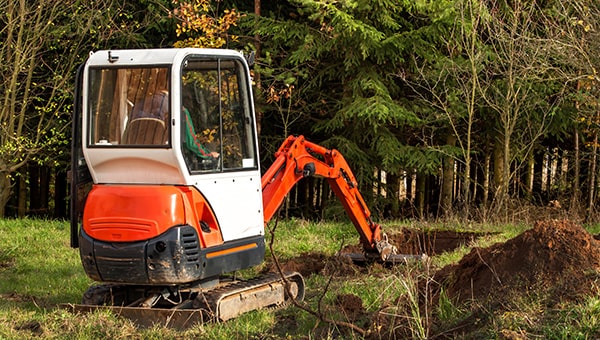
Step 2 - Dig the hole
Make sure that the excavated hole is large enough for both the tank and any recommended backfill. Please ensure that you follow the manufacturers detailed health and safety guidelines that will be provided in the manual when excavating your hole.
Remember to consider the drainage falls required. This should have been part of your planning already but it is worth double checking, especially for a gravity system. Typically these will be 1 in 60/70 between the house and tank, and a maximum of 1 in 200 for a drainage field.
Step 3 - Install the base
Your tank will need a solid base to sit on (most often a concrete one) to ensure stability and avoid unnecessary stress being placed upon it during operation. The manufacturer's installation guide supplied with your tank will instruct you further on the best type of base and how thick it should be.
Step 4 - Sit the tank
Lower the tank into the hole, using the manufacturer’s recommended lifting system, while checking that the inlet and outlet orientation is correct and ensuring the tank is level.
Step 5 - Backfill the hole
Once the tank is in place, it needs to be secured in the ground with the correct backfill. Concrete, gravel or sand are the most common recommendations, but check the instruction manual to see what the manufacturer advises and follow their steps for adding backfill to the site.
Step 6 - Install a septic drainage field
If you have planned everything out properly, this should be a simple case of laying the pipes for your drainage field. However, in case you forgot about it during your planning stage, or want to just double check your calculations and design, we have two separate guides that cover how to correctly size and properly install a septic drainage field.
Step 7 - Connect the pipes
Once everything is in place, you can then connect the tank inlet to the drainage pipe from your house and the outlet to your drainage field. This should be a straightforward task if everything has gone to plan, but a qualified plumber should be consulted if you are in any way unsure.
Step 8 - Fit the manhole cover(s)
Manufacturers will always assume the tank is going to be installed in a traffic-free area. If this is not the case, it is highly recommended that you contact a structural engineer before installing your system.
Things to avoid when installing a septic tank
To round this guide off, here are a few key things that you should ensure you DON’T do when installing your system.
DO NOT
- Subject the tank to impact or contact with sharp edges.
- Add neck extensions to the tank, nor build a brick manhole above the tank neck (as this increases burial depth of the tank). We do not recommend extending the neck of the tank under any circumstances unless.
- Install the tank deeper than the depth that the fitted neck will allow.
- Install in trafficked areas without a suitable backfill design.
- Site the tank so that it is subjected to excess ground pressure (e.g. sloping sites) or applied loads such as may be generated by the proximity of vehicular traffic.
- Fill an unsupported tank.
- Backfill against an empty tank.
So there it is, our guide to all of the things you need to think about and do when installing a septic tank. However, the physical installation of the system is not the end of this journey. Once the tank is in the ground and everything is connected up, you need to turn your attention to its operation and maintenance. For help with this, check out our guide to septic tank operation and maintenance where we discuss the do’s and don'ts of septic tank use and how to properly maintain them.
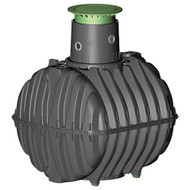
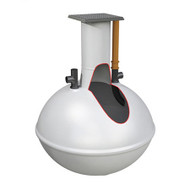
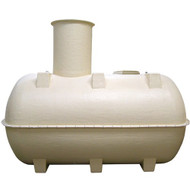
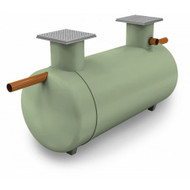
Septic Tanks


If you have any questions, or need any further advice on how to install, operate or maintain a septic tank system, contact us today. Our technical team is always on hand to help with all of your drainage needs.