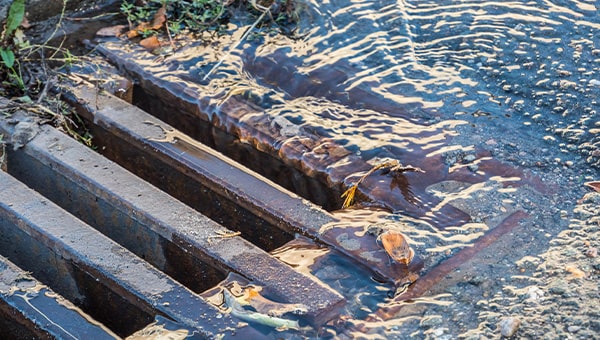
Blocked gullies and grids can be an absolute nightmare, especially if they aren't dealt with quickly. But gullies themselves aren't something that many of us tend to think about as needing much maintenance though. It's only once they start to drain slowly or overflow, and potentially cause your garden to flood, that you ever really notice they are there.
Thankfully, both maintaining your gullies and clearing them if they get blocked, are relatively easy tasks that you can carry out yourself. "How", you ask? By following the step-by-step instructions laid out in this article and by adding the maintenance tips mentioned to your list of regular outdoor chores.
If you are looking for more general information about what gullies are, check out our separate article, what are gullies and where do I need them?
What you will need
Before getting started, you will want to make sure that you have all of the following items to hand.
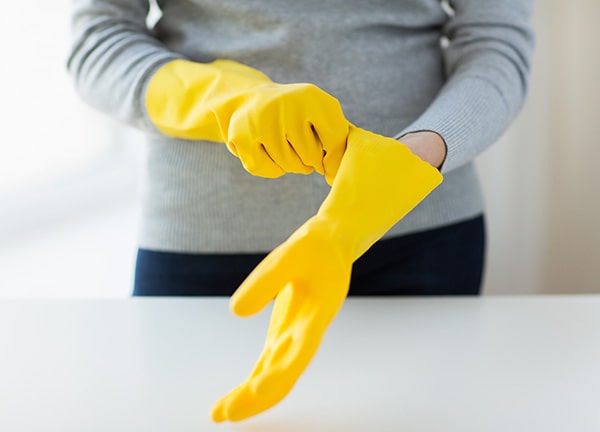
- Rubber gloves (ideally ones that cover your forearms if possible - marigolds are always a good choice)
- Protective glasses (even if you already wear spectacles - safety first)
- Garden brush
- Flathead screwdriver
- Trowel/small garden spade
- Drain rod (available from JDP)
- Hosepipe
- Bucket
- Access to hot water
Be Prepared
No, not for the coup of the century, nor even the murkiest scam, but rather for the messy job of cleaning your gully.
Dealing with grids, gullies and outside drains, in general, can be an unpleasant task. All kinds of muck and bacteria can live down in the dark warrens of underground pipework that drain water from your property, and you really do want to keep yourself protected from it. That's what the protective glasses and rubber gloves are for (hazmat suit optional for germaphobes like me). The glasses will prevent any splashback of dirty water getting into your eyes, and the gloves will keep your hands clean as you reach down into the soggy depth of your gully.
Also, suppose you have an older property that has a combined drainage system for surface water and wastewater (see our dedicated article, does your house have the right drain connections.) In that case, it is probably a good idea to make sure that no one else in the household is going to try using the toilet, shower, sinks, washing machine, or anything else that will drain wastewater into the gully. If you forget to do this...be prepared to potentially get a bit wet...and probably smelly too.

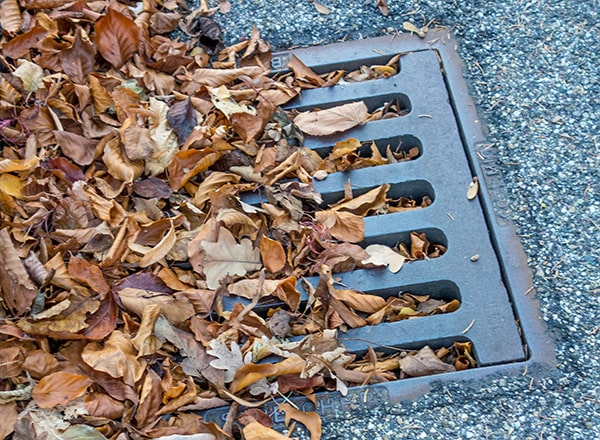
Step 1 - Locate the gully
This first step isn't meant to be patronising, but rather an acknowledgement of the fact that many of us know our gullies more commonly as grids. Technically speaking, a "grid" is the plastic or metal grating (also known as a gully trap) that sits on top of the gully to keep leaves, litter and other debris out of the drains as much as possible.
Terminology Tip: depending on who you speak to, or which website you look on, the term “gully trap” can be used to mean either the cover of the gully that traps debris, the bend in the gully that traps the water, or the entire gully itself. Because of this, reviewing guidance from multiple sources can get a bit confusing. For the sake of simplicity in this article, however, we will refer to the gully cover grating as a “grid”, the bend as a “trap” and the gully itself as a “gully”.
Ironically, over time, the debris that is caught by the grid can build up and become the very blockage it was trying to prevent. This is why good gully maintenance is important. But more on that later.
You may also have a number of gullies around your property, and it may not always be instantly clear which one contains the offending blockage. Look for the one that has the most debris in and around it, or the most pooled water that won't drain away. It could, of course, be the case that you have more than one blocked gully, meaning that you will need to follow this process on each. If so, it's still probably best to find the worst looking one though and start there.
Once you have located your blocked gully, you will need to try and clear any debris caught in the grid as you can with your hands...this is where you will be happy you have the rubber gloves. With the grid now as clear as possible, it's time to reach into the unknown.
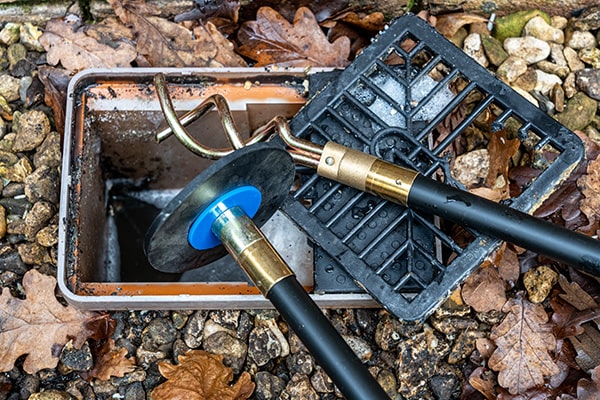
Step 2 - Remove the gully trap/grid
Depending on the age of your grid, this part could be a bit tricky and a potential dirty water splash hazard...hence why you will want the protective glasses. Usually a gully grid will lift quite easily by using a screwdriver to prise it open. However, if the grid has become a bit rusty or stiff, through age or lack of maintenance, you may need to be a bit more forceful in your methods.
Top Tip: Tying some string around the bars of the grid and giving it a few good tugs should help loosen it up, if you find yourself struggling.
With the grid out of the way, you should now have access to the inside of the gully.
Step 3 - Check inside the gully
With a bit of luck, you will find the culprit of your blockage is just a load of twigs and leaves that slipped down into the gully itself. This type of blockage is easily cleared, using either your hands (assuming you still have the rubber gloves on) or a trowel. You will most likely also find a lot of silt down the bottom of the gully, that has built up since the last time it was cleaned. While it may not be contributing to the blockage right now, it's still worth clearing it out while you are there to make sure it doesn't become a problem you have to come back to later.
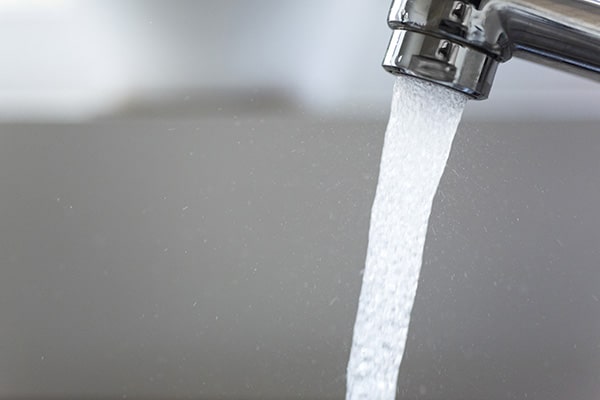
Once the blockage has been removed, the water in the gully should start draining away smoothly again. It's worth running a tap (if you have a combined system) or pouring some water down the gully, just to double-check that it all runs smoothly again before congratulating yourself on a job well done.
If, however, the water hasn't started to drain away properly, or there wasn't a visible blockage in the gully itself, you are going to want to move on to step 4.
Step 4 - Use a drain Rod
If the water hasn't drained away after you cleared out the grid and the gully, it means that the blockage must be further down the pipeline. Chances are though, you aren't going to be able to reach down there and get it with your hand or your trowel; that's where the drain rod comes in.
Note: If you didn't purchase one ahead of time, you can order one from our online store, drain clearing rod set.
A drain rod is essentially just a thin, flexible pole that can be inserted into the drain to clear a blockage. Usually about a meter long in length, these rods can be screwed together to form one long blockage-poking device.
Starting with just one rod, insert it into the gully and, assuming you don't have a P-Shaped gully (more on that in a moment), thread it down through the drain, adding extra lengths on as necessary until you find the blockage.
Once you encounter some resistance, start slowly prodding at it with the rod to break the blockage down into smaller pieces. These pieces should then begin to flush away down the drain without further issue. Be careful not to prod at the blockage too hard though, as you might end up just pushing the whole thing further down the drain without breaking it up. You also need to make sure that you don't accidentally rotate the blockage in an anti-clockwise motion, as this could potentially unscrew the pipe and leave you with a much bigger problem than the one you started with.
Can you use a drain rod with a P-shaped gully?
Unfortunately, due to the tight bend of its name-sake shape, a P-Trap gully can not be rodded because there is no way of getting the rod into the drain around the trap. If you have this type of gully, and a rodding eye access point wasn’t specifically added during installation, you're probably going to need to call a plumber if you have been unable to clear the blockage by hand. For more information about the different types of gullies available, check out our article on what gullies are and where you need them.
Step 5 - Rinse out the gully
Now that the blockage has been broken up, you will want to drag out the hose, point it into the gully and wash it all away. Before turning the hose on, however, grab your garden brush and have a good sweep up around the gully to make sure there's no more debris lying around that could accidentally get rinsed into the gully while the trap is still off.
With the area clear, turn the hose on, point it down the gully and let the water blast down the pipe for several minutes. This should pick up any remaining debris in the drain and wash it safely away.
Step 6 - Flush out the gully
I know what you are going to say, “Isn't rinsing and flushing the same thing?", and yes, technically it is. However, this extra cleaning step is important for combined drains that deal with grey wastewater, as the blockage is likely to have caused a build-up of grease and fat that the rodding and rinsing will not have fully cleared.
The only way to get rid of that fat and grease is with hot water...and maybe a little bleach or washing up liquid added to it for extra effect. This is the reason you needed to have a bucket.
Fill up your bucket with hot water and pour it carefully into the gully. This should melt and dislodge any remaining fat and grease clogs in the drain and leave your system running nice and smoothly again.
Caution! Do not use washing-up liquid or bleach in this step unless you are 100% certain that your property has a combined drain system, as there is a chance you could be polluting a watercourse if it doesn't.
Step 7 - Test the gully
Once your gully has been rinsed and flushed (if needed), the job is almost complete. The blockage should be gone, and any standing water should have drained away.
Before you go closing the gully up again, however, it is advisable to run your taps for a few minutes (for a combined system) or pour another good bucket full of water down the gully (if you have a separate system), and monitor it. This is just to help you make sure that everything is draining away properly, and there are no further clogs.
If you notice the water still draining away slowly, you may need to repeat the rod, rinse and flush stages of this process. If you are happy all is well though, simply replace the grid over the opening and congratulate yourself on a job well done.
Maintenance Tips - Prevent future blockages
With your gully and drain now all squeaky clean and free from blockages again, you might want to turn your attention to some preventative measures you take to help avoid the need to go through all this again any time soon.
Since you are already outside in your scruffy clothes, fetching marigolds and safety glasses, you might as well do a bit more cleaning. Grab the garden brush again and have a good sweep up of the wider area surrounding the gully to get rid of any leaves, twigs and other debris that might otherwise get washed into it the next time it rains. It would also be worth inspecting the guttering around your property and clearing out any moss and other natural debris that could be washed down into your gully.
Caution! You should only attempt the inspection and/or cleaning of your property's gutters if you are trained/experienced in the proper use of ladders and working at height. If in doubt, hire professional gutter cleaners.
These two activities should now become part of your regular property maintenance routine (especially when you know periods of potentially heavy rainfall are on the way), to help prevent future blockages.
For the general health of your property's drains, you should also consider making a habit of the following preventative measures (especially if you have a combined drainage system):
- Flush your gully with hot water at least once a month
- Avoid flushing too much paper down the toilet
- Avoid pouring fats and grease down your sink
Never dispose of any of the following down your drains;
- Cat litter
- Disposable nappies
- Sanitary products
- Paper towels
- Facial tissues
- Coffee grounds
- Cigarette ends
Summary
Grids, gullies and gutters all form an essential part of any property's drainage system, as they help prevent rainwater and surface water from flooding our homes. In combined drainage systems, the grids and gullies will also help to dispose of wastewater into the drains. For these reasons, their regular maintenance and upkeep is a crucial task for any homeowner wanting to protect their property.
By using this guide and following the maintenance tips, you should be able to keep your drainage system healthy and blockage free yourself. If you have been unable to clear your blockage, however, we would recommend consulting with a qualified plumber, as the problem may require more professional treatment.
If you have any questions or need any further advice about your gullies or drains though, contact JDP today. Our technical team is always on hand to help with all of your drainage needs.