The topic of ducting can be a confusing one, given that many people associate the term more with ventilation than utilities. Sometimes it can be difficult to find the right answers to your questions all in one place. That is why we have put together this handy FAQ article, to hopefully answer all the underground ducting questions that you may have.
What is underground ducting?
Underground ducting refers to the protective pipework through which essential utility pipes and cables are run underground to provide buildings with power, water and gas etc.
When you search online for “ducting”, however, most of your top results are going to come back with information about heating, ventilation and air conditioning ducts, which is of no use to you if you are looking for underground ducting. Being aware of this potential confusion of terms should help you avoid inadvertently looking at the wrong kind of ducting. Searching for “Underground Ducting” or “Utilities Ducting” should produce more relevant results.
Why use underground ducting?
Underground ducting is used to both protect water pipes, gas pipes and eclectic cables from being damaged, and also to protect people from their (potentially dangerous) contents.
Almost all buildings make use of utilities and services that are delivered through pipework and cabling. If left above ground, these pipes and cables are exposed to a higher risk of being crushed, broken, tampered with or compromised by the environment/weather. They also provide a greater risk to the safety of people who might come into contact with them. If an electric cable is damaged, it could expose people to a potentially fatal electric shock. If a gas pipe is damaged, it can release flammable gas. If a water pipe is damaged, it can cause flooding. Being buried underground reduces many of these risks and makes for a tidier installation.
However, even underground, these pipes and cables can be damaged e.g. by root growing around/through them, or people accidentally digging into them. That’s where underground ducting comes in. By running utility pipes and cable through ducting pipes, it provides an extra layer of protection against the environment/accidental damage.
Another important reason for using ducting is to allow you or your groundworker to install the ducting prior to the services being connected. It is very rare that the services provider is on hand at the same time as the groundworks are being carried out. Ducting allows ground levels to be reinstated ahead of connection to meet important construction deadlines.
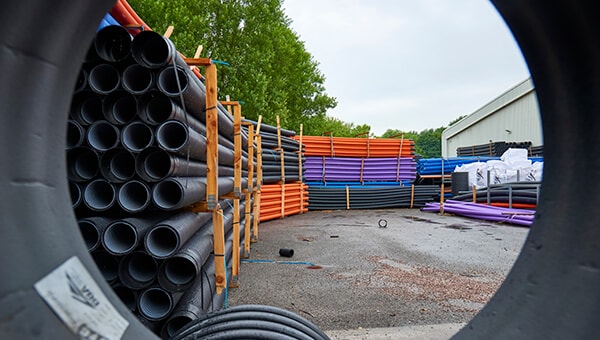
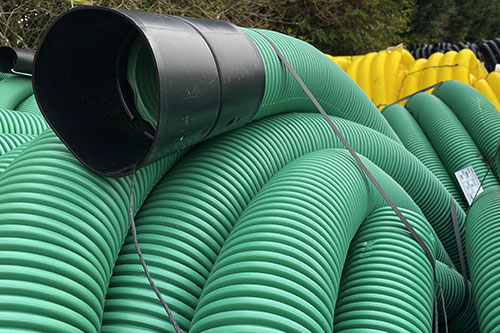
Why are underground ducting pipes different colours?
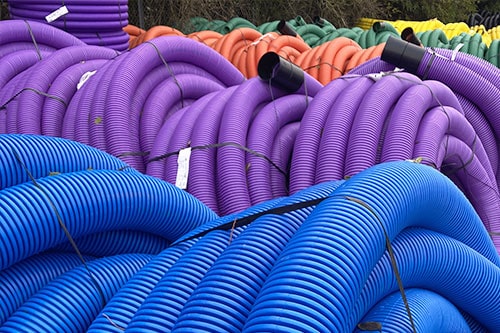
Underground ducting pipes are colour-coded to help identify what utilities are passing through them. This helps people digging in the area around these pipes/cables to easily identify the utilities within. Here’s what the colours mean:
- Black ducting = low voltage domestic mains electricity cable.
- Orange ducting = cables for street lighting and/or traffic signals.
- Purple ducting = cables for motorway communications (e.g. speed cameras, traffic cameras and emergency phones etc)/ cables for street lighting (in Scotland).
- Yellow ducting = service and mains gas pipe.
- Blue ducting = water pipes and water barrier pipes.
- Green ducting = cables for CCTV and fibre optics.
- Grey ducting = cables for BT/telecommunications.
Check out our dedicated article on a guide for different ducting colours for more information on this.
What are the different types of ducting?
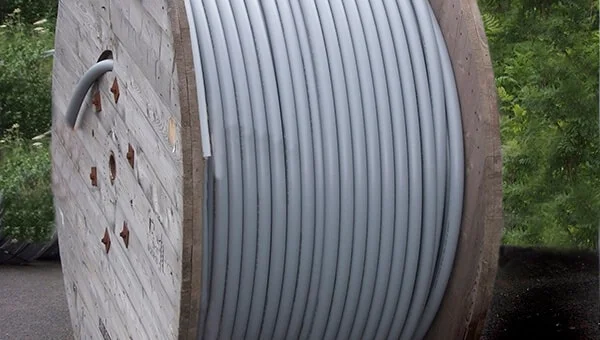
Here at JDP, we stock Polyethylene (PE), UPVC, and Twinwall HDPE ducting pipes in various colours where suitable. These themselves then come in either rigid lengths or flexible coils, and even (in the case of eclectic cable ducting) a number of different classes.
Different types of utilities and installations require different types of ducting. Aside from the colour coding mentioned above, underground ducting also comes in a range of materials and designs. Plastic ducting is the most common these days, but even this comes in different types.
Polyethylene and UPVC are usually the materials of choice for solid wall pipes, and made to suit various applications depending on the specification and project requirements. Twinwall HDPE pipes are best used in areas that require some extra strength, such as beneath heavy concrete under a road/pavement - although all pipe materials come in different compression strengths and SN ratings, so it’s always best to check.
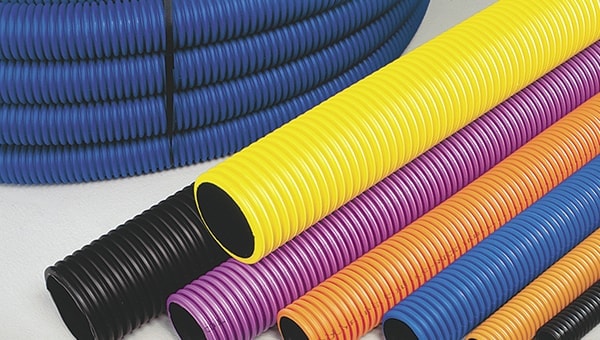
What is the difference between rigid and flexible ducting?
Put simply, rigid ducting refers to ducting pipe that comes in straight, rigid lengths (sometimes referred to as “sticks”), that have a smooth inner bore and a smooth exterior profile. Whereas flexible ducting refers to ducting pipe that comes in coils that have a smooth inner wall and a corrugated external wall for extra strength. Single wall rigid ducting is generally used for shorter runs of pipe, and flexible ducting for longer runs, as it’s corrugated outer wall gives it a stronger structure.
What is cable ducting?
Cable ducting technically refers to any duct work through which cables can be run. However, the term is more often used to denote ducting for electricity/power cables, such as the mains supply to your property etc.
Why is electric cable ducting important?
Electric cable ducting is especially important because it protects both the electric cables from damage and, arguably more importantly, people that come into contact with them from harm.
Electric cables can carry a potentially deadly charge through them, and can still pose a risk to people even when buried. If, for example, you were unaware of the cable’s location underground, dug down with a spade and damaged the cable, the result could be quite shocking. Electrical cable ducting can help to protect both you and the cable. If matched correctly to the utility in question, the appropriate ducting can be used to provide both a protective barrier between you and the cable, and also to insulate the cable to prevent it from delivering a fatal shock should you still come into contact with it.
What are the different class types for electric cable ducting?
Class 1, 2 and 3 ducting is for use with high voltage, low voltage and general application use respectively.
Underground electric cable ducting in the UK must comply with ENATS (Energy Network Association Technical Specification) 12-24 classes and be manufactured to BS EN 61386 (which superseded BS EN 50086). The relevant electricity provider for the area of installation should be able to give guidelines as to which class your project would need.
For more information on these class types, check out the “Choosing the right material” step in our how to install underground utility ducting pipes guide.
Is cable ducting and cable trunking the same thing?
Cable ducting is for use in outdoor, underground utilities installations and cable trunking is used for indoor cable management.
Yes, they are both designed to keep cable safe from damage and hidden out of sight. However, there are some key differences. First of all, cable ducting is made up of lengths or coils of pipe, whereas cable trunking is an enclosure, usually with a rectangular cross-section and one removable or hinged side. Cable trunking is most commonly seen in office buildings as white plastic boxing that runs along walls adjacent to electrical equipment to keep the connected cables safe and tidy. You would (hopefully) never find trunking buried in the back garden with mains power cables or other utility pipes running through it. That is what underground ducting is for.
What is the difference between green and grey ducting?
Grey ducting is used for BT telecoms and communications and green for all non-BT applications.
Technically, both green and grey ducting are used for telecoms and communications cables. However, grey ducting is more commonly referred to as “BT ducting” due to it being specially designed to comply with the specifications of the national BT network. Green ducting, in comparison, can be used for all non-BT telecoms and communications cabling.
Check out our dedicated article on the differences between green and grey for more information.
What are the benefits of using Gas and Water ducting?
Ducting helps to protect these pipes from damage, stop water leaks, disperse gas leaks, and prevent contamination.
Protection from construction/environmental damage is the common benefit for all utilities pipes and cable encased in suitable ducting. When it comes to Gas and Water though, there are some extra benefits.
For water pipes, these include stopping leaks and preventing contamination. If water pipes are incorrectly sealed (or the seals are damaged over time) and they aren’t protected by any ducting, there is a greater risk of the water within being subject to potentially dangerous external contaminants. Also, should the pipe become damaged and spring a leak, the escaping water, if undetected, can eventually cause erosion to occur and destabilise the surrounding ground. Having water pipes encased in water ducting helps to prevent either of these things from happening.
For Gas, it's a bit different. Usually, gas ducting pipe will be perforated, meaning that it won’t help to contain a gas leak. However, what it does do is allow the leaked gas to safely vent and disperse into the soil through the perforations, while also aiding detection.
Where can you use general purpose ducting?
Anywhere that doesn’t require conformity to specific standards.
General purpose ducting is usually manufactured from either twinwall or uPVC, and retain many of the same benefits of their visually identical counterparts. However, the key difference with general purpose ducting is that it doesn’t conform to any specific standards. This means you can only use general purpose ducting for applications which do not require you to meet any BS EN or ENATS specifications. Most network and utility providers have specific requirements, so you should always check before installing the wrong ducting.
Check out our dedicated article on when to use general ducting for more information on this.
How deep should utilities ducting be buried?
Different utilities need to be installed at different depths as, therefore, do their corresponding ducting pipes. You should always check with your local utilities company for their recommended installation depths, but the following can be used as a rough guide of standard depths.
- Red or black power/electricity ducting can be installed at depths of 450mm to 1200mm.
- Blue water pipe ducting, installed at 750mm.
- Yellow gas ducting, installed at 600mm.
- Green ducting used for CCTV, installed at depths of 250mm to 350mm.
- Grey BT/Telecoms ducting is installed at 350mm also.
Please Note: all depths shown are measured from the top of the pipe to the finished ground level.
For more information about recommended installation depths, check out our how to install underground utility ducting pipes guide.
How do you join lengths of ducting?
This will depend on the type of ducting you use as rigid ducting and flexible ducting both require different types of connecting coupler. Make sure you select the right coupler for the job and seal any joints and connections properly.
How do you check underground ducting for damage?
Assess the possibility of damage (severe weather event/corrosive soil etc), turn off your utilities, carefully excavate down to the ducting, and visually inspect for damage.
Underground ducting is designed to last for many years but, as will all things, nothing lasts forever. Over time, ducting can lose its efficiency, either through being damaged somehow or because it has started to erode. However, the only way to really inspect your ducting for damage (assuming there has been no obvious signs like loss of power or flooding etc) is to dig up the ground and visually take a look. For this reason, you should only consider doing it if you know the ducting has been down there a long time, if the soil in the area is particularly corrosive and/or if there has been a recent weather event that you think could have affected it.
If you do have a genuine concern that the ducting could be damaged or compromised in some way, here are the steps to follow:
- Step 1 - Turn off your utilities and allow enough time for the electricity, gas, water etc, to leave the system before you begin to dig down.
- Step 2 - Carefully dig down to the level of the ducting pipe, excavating as much of the pipeline as you think is necessary.
- Step 3 - Make a visual inspection (avoid touching the ducting directly, just to be safe) and look for signs of fraying, holes, cracks, thin patches in the material etc.
If you spot any damage, even just on one section, it is recommended that you get the ducting system completely replaced for safety purposes and for peace of mind. For a temporary repair or in situations where replacement is not an option, we do also provide split ducting. This is an innovative way of surrounding the damaged section without having to remove the existing ducting.
What does the law say about underground utilities?
The legislation in place for the installation of underground utilities centers mainly around the minimum depths at which the relevant pipes and cables must be installed at. When it comes to underground ducting, it is also a legal requirement to use the right colour duct for the appropriate utility. Information for both of these can be found in the questions above.
It is illegal to use, or continue to use, any underground cable/pipe and any attached equipment if you are aware that the installation does not comply with current regulations.
For more information on the rules and regulations surrounding underground utilities, we recommend visiting the government's Street Works UK website.
How do you install underground ducting?
Installing ducting isn’t necessarily difficult, but ensuring that it is installed safely, efficiently and in compliance with the law does take a bit of common sense and planning. The basic steps for installing underground ducting are as follows:
Step 1 - Choose the right colour duct to match your utility.
Step 2 - Choose the most suitable material for the conditions of your installation, which includes the utility providers specification.
Step 3 - Plan your installation route and check no other utilities run through it.
Step 4 - Ensure the utilities you are installing are switched off before you begin.
Step 5 - Excavate a trench to the appropriate depth for your utility.
Step 6 - Install the ducting efficiently with as few bends as possible.
Step 7 - Use draw cords to help run the pipes/cables through the ducting.
Step 8 - Final checks of the installation to ensure everything is connected and sealed correctly.
Step 9 - Turn utilities back on and inspect for any leaks/connection issues (if possible)
Step 10 - Install appropriate marker table above the ducting at the recommended depth, fill in the hole and pat yourself on the back for a job well done.
For a more detailed description of this installation process, check out our dedicated article on how to install ducting.
What are duct access chambers?
Duct access chambers are chambers installed along a ducting installation to provide easy access to the underground pipes/cables in the system for inspection and maintenance purposes.
Here at JDP, we supply duct access chamber systems for street lighting, traffic signals and the communications industry. We also have access chamber systems that are suitable and accepted by the water, rail and CCTV sectors. View our current range of access chambers at our online store.
How do you install a duct access chamber?
This will often depend on the type of ducting access chamber you install, as well as its planned location, and the manufacturer's guidance should always be followed. However, the basic steps for installing ducting access chambers are as follows:
Step 1 - Assemble the chamber.
Step 2 - Excavate hole to required depth - allow clearance for concrete backfill.
Step 3 - Install a concrete base for the chamber - include a drainage sump.
Step 4 - Knock-out/drill all required holes.
Step 5 - Position the chamber body centrally and connect all necessary pipes
Step 6 - Backfill with concrete or As Dug backfill, depending on manufacturers guidance.
Step 7 - Fit manhole cover and frame
Step 8 - Allow three days for concrete to harden.
Hopefully this FAQ will have answered many of your underground ducting related questions. But, should you have any further questions, or need any advice on how to choose/install the right ducting, contact us today. Our technical team is always on hand to help with all of your drainage and pipework needs.