Plastic underground ducting is the most efficient way of installing and protecting underground cables & pipes in a domestic situation. When laid properly, it will alert any future excavations to the presence of the cables & pipes, and allow for any replacements to be installed easily.
But how exactly do you go about installing underground ducting for utilities pipes and cables? What things do you need to think about when planning where to install them? What colour ducting do you need, and how deep should it be buried? These are all questions that will be answered within this guide.
Fortunately, the actual installation process for underground ducting isn’t all that complicated; you dig a trench, lay the duct, pass the pipe/cable through the duct, and fill in the trench with the appropriate back-fill. However, the complications arise in the planning of your installation and in understanding the rules and regulations for each type of utility. The following steps should help guide you through the best way to ensure your underground utilities ducting is installed properly and legally.
Step 1 - Choose the correct colour.
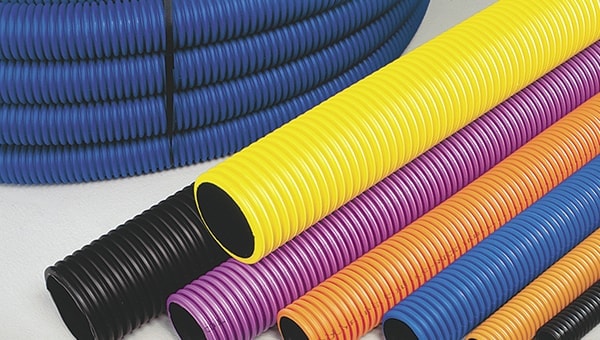
The first step to installing any underground ducting is to make sure that you are definitely installing the correct colour of ducting. It is vital that you choose the right colour for your utility as they all have very important individual meanings. Each utility type has been assigned a specific colour in the UK, and it is a legal requirement for the correct colour to be used with the correct utility at all times. This standardisation ensures that on-site engineers and excavators know instantly what is in the pipes and can act accordingly to avoid damaging or interfering with them. For more information about this colour-coding system, see our dedicated about why ducting pipes are different colours.
Step 2 - Choosing the right material.
Plastic underground ducting is available in a number of varieties and, while they all technically do the same job, it is still important to ensure you pick the right one for your installation. The best way to achieve this is to contact the utility provider for their recommendations. However, the following examples can be used as a general guide:
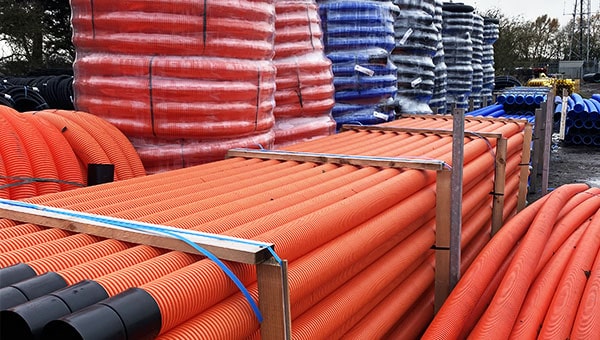
Short RunsIf you are laying utility cable/pipe over a short distance, it is best to use a 6m length (or rigid “stick”) of smooth-walled PVC rigid ducting (most commonly used for telecommunications and fibre optic cable installations), or Twinwall HDPE ducting pipe. Both are much easier to manage and lay than 25m/50m coils of flexible PE and HDPE ducting if just a short run is required.
- Long Runs
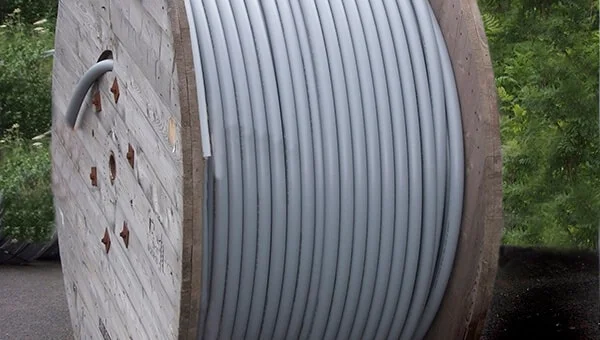
If you are laying utility cable/pipe over a long distance, the best option would be to go for 25m/50m coils of either flexible PE (this type of ducting is “semi-flexible” and most commonly used for electric cable installations to buildings), or Twinwall HDPE. As the name suggests, Twinwall HDPE ducting pipes consist of two walls. The external wall is corrugated, which gives a much stronger structure than a single wall pipe of the same material, and the inner wall is smooth, which aids with the threading of the cables/pipes. The flexibility of both of these ducting pipes accommodates minor changes in the depth of your trench (nobody digs a perfectly level trench over a long distance) much more easily than rigid ducting would. This type of ducting is most commonly used to protect service pipes and electrical cables.
Be aware that the highly flexible nature of HDPE Twinwall HDPE ducting pipe means that you should be careful not to install with bends too tight for cables to be pulled through.
-
Extra strength requiredIf you are laying utility cable/pipe in an area subject to heavier loads, such as beneath heavy concrete or under a road/pavement, the best option would be to use a suitable strength ducting. The material itself is not a prerequisite for strength. All lengths/rigid “sticks” and flexible coils in Twinwall HDPE, PE or uPVC can be manufactured to differing strengths (SN rating) and kN crush resistances. The extra strength ensures that the utility cables/pipes within will remain protected. In general, pipes with a minimum compression strength of 450kN or SN6 rating should be used in these situations.
When it comes to laying electric cable underground, there is an extra consideration to be made in your choice of ducting. Underground electric power cable ducting systems must comply with ENATS (Energy Network Association Technical Specification) 12-24 classes and be manufactured to BS EN 61386 (which superseded BS EN 50086). Within this specification, there are three class types that inform what applications the ducting is suitable for. These class types are as follows:
- Class 1 - for high voltage applications (33kV, 66kV & 132kV with 450kN compression performance at operating temperatures of 75°C).
- Class 2 - for low voltage applications (230v/11kV & 20kV with 450kN compression performance at operating temperatures of 50°C).
- Class 3 - for general applications (450kN compression performance at operating temperatures of 23°C).
DO NOT be tempted to go for the cheapest option and assume it will be okay! Aside from breaking the law, you will be creating a dangerous health and safety risk for yourself and other people who may come into contact with the cables in the future. If you are unsure which class of electric cable ducting you would need, contact the utilities provider or speak to out technical team for expert advice.
Step 3 - Check the legislation.
When laying underground ducting for utilities cables/pipes, there aren’t many rules and regulations to follow, thankfully, but it is still crucial that you follow them all the same. If you’ve been following our guide this far, you should already be compliant with the first rule:
Thou must always adhere to the universal colour code and match the colour of your ducting correctly to the utilities cable/pipework it shall protect.
All joking aside, this is a legal requirement and should be taken seriously. Follow the link in Step 1 above for more information about the colour coding system in place for underground ducting.
The second import rule you need to be aware of is in regards to the excavation depths for each utility. Legislation in the UK dictates that underground utilities must be installed at various minimum depths.
Some recommended depths, such as those for power and electric ducting, change depending on the location of install. For example, high voltage electric cables should be laid at a depth of 450mm as standard. However, if it is being installed under a carriageway or in agricultural land (that isn’t subject to deep ploughing), this depth should increase to 750mm and 1200mm respectively.
Water ducting can sometimes be installed at shallower depths if needed (check with your utilities provider first), but only if the water pipes are wrapped in foam insulation (also available from JDP) before being threaded through the ducting system. This is to ensure that the water is protected against frost that can permeate through shallower depths of soil.
The key thing to remember here is that, if you are in any way unsure about how to install your ducting, you should always seek advice. The use, or continued use, of any underground cable or pipe is illegal if you are aware that the installation does not comply with current legislation. Do the research, ask for advice and do the job right first time, or risk the cost of being made to do it all again at your own expense.
More guidance and recommendations about the laying of utility cables and pipes can be found via the government's Street Works UK website.
Step 4 - Plan your installation route.
By now you should know exactly what type of ducting you need and how deep you’ll need to lay your cable or pipe underground. However, before you go rushing off to grab a spade to dig your big hole, you need to plan exactly where your ducting will need to run.
Now, you don’t need a draftsperson or site engineer to do this, you just need to employ a bit of common sense. Unless you are installing brand new utilities on a brand new site, chances are that there will already be some cables and pipes buried in the ground (hopefully in the appropriate ducting). For this reason, you don’t want to just go digging around without first checking what might be under your feet.
Speaking to the relevant utilities providers, reviewing any plans or maps of the property you have access to and/or using an underground cable/pipe locating device are the best ways to avoid digging a trench that other utilities already run through/along.
Once you know where you shouldn’t dig, it’s time to plan out where you can. The best rule of thumb for laying underground cables and pipes is to run them along an obvious route, such as a path or the property boundaries, and use as few bends as possible.
Please note: if running any utilities along the property boundaries, it is important to speak to the owner of the neighbouring property to find out where their utilities run and which company is responsible for them.
Once you’ve picked your route, it’s a good idea to lay your ducting out on the surface along the planned path it will take, using pre-formed, long radius bends (for straight ducting), or access chambers for any changes in direction. If you are using flexible ducting coils, and don’t want to install access chambers, you’ll need to plan space for a 90dg bend over 1m of pipe instead, to prevent snagging or kinks in cables/pipes when they are pulled through the ducting. This process should help ensure that you have all the parts and pieces you need to complete the system before you start digging.
If you have to join up any of your ducting, make sure you are using the appropriate method for the type of ducting you have selected, and have purchased any relevant couplers and joints.
- Rigid ducting lengths - tend to come with a “blown-end” socket on one end which allows for simple “plain-end to socket-end” connections to be made.
- Flexible ducting coils - should come with a pre-installed joiner at one end for connection purposes. Additional couplers can be purchased separately as required.
- Twinwall ducting - comes plain ended and requires appropriate couplers (purchased separately) to join them together.
Top Trick: When connecting lengths of rigid ducting with a “plain-end to socket-end” design, a good method for ensuring a tight seal is to cover the socketed end of one pipe with a board or piece of wood (to protect it from damage) and then hit it with a mallet or hammer until the pain-end of that pipe is sitting firmly in the socket-end of the preceding pipe.
With the ducting all laid out to ensure the planned route is viable, mark out your proposed trench, move the ducting out of the way, and move on to the next step.
Step 5 - Switch off the affected utilities.
This is a simple step and should be quite obvious...but it’s worth double checking, just to be sure. When you are dealing with electricity, water or gas especially, a safety first approach is of paramount importance. Ensure the utilities you are planning to install are switched off before you begin. If you are going to be digging close to any other utilities you know about, it’s probably worth turning off the supply for them too. If you know there are other utilities in the ground but have no idea where they are...get them all turned off and dig very carefully.
Step 6 - Excavate a trench.
Whether you are using a trusty shovel or a mini digger, caution needs to be at the forefront of your mind as you begin to dig. Even though you’ve done all your checks and planned your route to avoid other underground utilities, we don’t live in a perfect world. There are older, less compliant services and pipelines in the deep places of the world...or potentially just your back garden, if you have an older property. It is always worth keeping this in mind, as:
- Colours of pipe may look different under poor or artificial lighting.
- Corrosive soils may discolour pigments in ducting, pipework and cable colourings over time.
- Older pipe or ducting could contain utilities that don’t match up to current colour coding.
- Marker tapes may not be present due to age or practice.
- Older markers should not be taken as an accurate indication of what lies below.
If you do come across older pipes, cables or ducting while digging your trench, we would strongly advise that you stop what you are doing and get a professional in to help identify what they are.
Once this has been sorted, or if your dig was trouble free, you should have a nice pipe or cable trench dug down to the appropriate depth for your utility (see table of recommended depths above). Before you move on to installing your ducting, however, it is a good idea to inspect the trench and remove any sharp shones or large rocks that might otherwise damage your ducting pipe. Laying 50mm of sharp sand to sit the ducting on can also help to further protect it.
Step 7 - Install the ducting.
Now that you have your trench all nicely prepared and ready for your ducting, it’s time so start laying some pipe. It’s worth taking the time at this point to inspect the ducting for any cracks or damage that may have been sustained between the time of delivery and install. It would be far better to be inconvenienced by the need to replace part of your ducting system at this stage of the installation, than to have it impact the safety of your system.
Once you are happy with the condition of your ducting, you can start laying down the lengths/ coils and connecting them together with the appropriate couplers, bends and/or access chambers as necessary.
It is wise at this point, however, to consider threading some 6mm drawcord through each length/coil as you go. This will make pulling the utility cables/pipes through the ducting in the next step much easier. Some flexible ducting coils can be purchased with drawcord already included, but often it will need to be purchased separately. Where a drawstring is supplied inside the duct, however, this is for pulling a drawcord through, it is not strong enough to pull cables or pipes. Make sure you have enough to thread through the entire length of your ducting system. For extra peace of mind, thread two lengths of drawcord through your ducting; one for pulling your cables/pipes through, and the other as backup in case something goes wrong, or as a courtesy for future installations/repairs.
Top Trick When trying to get the cord through the ducting an efficient way of doing it is to attach a rag/cloth that fills the width of the pipe but is still easily pulled through. Attach a vacuum cleaner to the opposite end of the ducting with some duct tape so there is an airtight seal. Run the vacuum for a while and then introduce the rag and the vacuum should then pull the cord through easily.
Step 8 - Run the pipes/cables through the ducting.
Assuming all went well with the installation of your ducting, you should now be ready to thread your utility cables or pipes through it. If you ran your drawcord through the ducting, as suggested in the previous step, you should simply now need to tie one end of the cord to your cable/pipe and pull it through the system with the cord at the other end.
If you didn’t install any drawcord...go get some and install it now. If you can’t get any drawcord, or don’t want to use it...better get pushing on that cable/pipe and hope it doesn’t get stuck anywhere along the way.
Step 9 - Final checks.
If all has gone well, you should now have yourself a properly installed ducting system protecting your utility cables or pipes. Before burying it all and closing up the trench though, it’s probably worth taking the time to ensure everything is connected and sealed correctly and, if possible, turning the utilities back on to check for any leaks/connection issues. It’s much easier to do this now than when the system is hidden away underground.
Step 10 - Install appropriate marker tape & backfill the hole.
Once you are happy that the installation has been a success, you can begin filling in your trench. It is good practice to initially cover the ducting with 100-150mm of “distinctive” sand. Not only will this sand layer serve to protect the ducting from any sharp stones or big rocks getting thrown back in with your excavated soil or suitable backfill, the clear change in the ground material will help alert future excavations to the presence of the ducting.
At this level, you should also install an appropriate warning marker tape along the entire length of the system. Warning marker tape serves as an extra safety measure for future excavations, giving ample warning to those digging in the area of there being utilities below. For each utility type there is an appropriately coloured marker tape available with a suitable warning, and care should be taken in selecting the right one for the job. If you use the wrong warning tape above your ducting, you could be putting someone’s life at risk in the future.
With your marker tape in place, you can continue to backfill and compact your trench. All that’s left to do then is to turn your utilities back on (if you haven’t done so already), tidy up your tools, and pat yourself on the back for a job well done.
If you have any questions about ducting that weren’t covered in this guide take a look at our ducting frequently asked questions article to see if we have answered them there. Alternatively, our technical team is always on hand to offer free and impartial advice for all of your ducting needs. Contact us today if you have any questions about your current or upcoming projects.