Installing guttering yourself may seem like a bit of a daunting task, but, in essence, it is one of the more simple DIY tasks you can undertake. The key to it is in ensuring that you properly plan, prepare, and always work safely. To help you do this, we have created this guide to be a straightforward, yet comprehensive, walk-through of everything you’ll need to do to prepare for your installation.
If you feel like you are already fully prepared for the task and just want a step-by-step DIY guide to follow, head on over to our guttering installation guide. Before you go though, we do recommend at least taking a quick look through this article first, as there might just be some nugget of useful information that you haven’t yet thought of yourself.
Planning your guttering installation
Before you can buy in all the pieces and parts needed to construct your new guttering system, you need to know exactly what type of guttering will be best for your property. First and foremost, you need to measure up your roof so that you can calculate the Effective Roof Area and Gutter Flow Capacity required. Fortunately, we have a separate guide that can take you through all the necessary steps involved in choosing the right size guttering for your house.
Once you know the size of the guttering you require, and have chosen the style and profile you want (check out our guide to the different types of guttering for more on this), it’s time to plan out exactly what you will need to buy. To do this, we recommend using our component diagram, along with the measurements you will have taken of your roof, to help visualise the products you will need and select the right quantity of each. For a more detailed breakdown of what each component of the gutter system is and does, check out the guttering system overview in our basic guide to guttering.
Important note: If you are planning to use Niagara Ogee style guttering from our Floplast range (or any other Ogee/K-Style gutter for that matter), it is vitally important to remember that the shape of this type of gutter is not symmetrical. Therefore, certain fittings are specifically “handed” for use on either the left or right hand side of the gutter. This is especially important for stop ends, so make sure you count up exactly how many gutters will need capping on their right-hand side and how many on their left-hand side to avoid running into problems during installation.
Here are a few things to ask yourself when planning your system.
How many fascia brackets does my guttering need?
A good rule of thumb is to have your gutters supported by brackets no more than 1m apart and no more than 150mm from any angle or stopend. So, if you buy your guttering in 4m lengths, you will need 3 brackets per length, 1 bracket per stopend and 2 brackets per bend. However, if the pitch of your roof is over 40 degrees (or 10/12 - see our guide to sizing up your roof for advice on how to measure this yourself), we would recommend installing your brackets between 800mm and 600mm apart to help cope with the increased water flow speed this will cause. If, on the other hand, you live in an area that is prone to heavy snowfall through the winter months, you will want to reduce the spacing of your fascia brackets even further, ideally to no more than 400mm apart. This will help your gutters cope with the extra weight when the snow comes and (hopefully) prevent them from collapsing.
How do I install fascia brackets if there are no fascia boards on my house?
A fascia board is a band that runs around the edge of a building’s roof to cover the ends of the roof rafters and close the gap between the roof and the wall. Usually made from wood or PVC plastic, they make a great anchor point for your guttering. But what if your house doesn’t have any fascia boards? This isn’t all that uncommon in older properties and can pose a bit of a challenge to gutter installations. Fortunately, there is a simple solution to this - the universal rise and fall bracket. This handy fitting, which we supply in our Floplast guttering range, comes complete with a mortar spike that allows it to be set in between your brickwork. This then gives you a sturdy anchor point, that mimics the depth of a fascia board, to fix your fascia brackets to. Alternatively, we can also supply you with rafter brackets that do the same job by fixing straight onto the side or top of a rafter instead of the wall. For either of these options, the installation steps will be the same as those for installing the fascia brackets shown in our guide later on.
How many downpipes do I need?
The answer to this will largely depend on the size and pitch of your roof, as the larger the area and steeper the slope, the greater the capacity and flow of rainwater being channelled by your gutters will be. However, a good rule of thumb here is to have one downpipe for every 9m (30ft) of gutter. Installing more gutters can increase the capacity of your system, but it can be problematic if you don’t have enough drains around your property to direct them into. If you already have an existing gutter system that you are simply replacing, the easiest solution is to simply count the number of downpipes you already have.
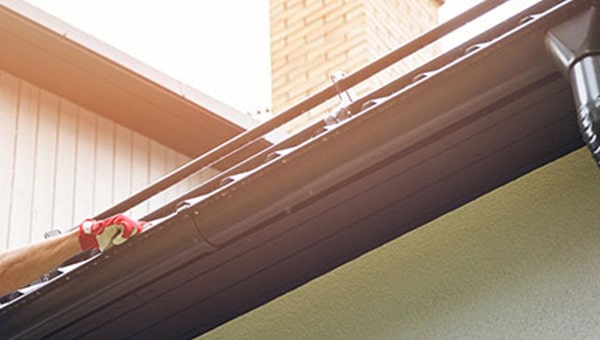
Do I need to use silicon spray on the gutter joints?
Ideally, yes. At least, that is our recommendation for any gutter fittings we supply that have seals in them. The use of silicone lubricant assists with the connection of the fittings to the gutters without having a detrimental effect on the seals themselves (as can other non-silicone lubricants such as washing up liquid).
Can I connect my downpipe into my underground drainage?
If you don’t fancy the mess of potentially having to regularly clean out your gullies and grids that the downpipe discharges into, you can use downpipe adaptors to run the downpipe directly into an underground drainage pipe. If you do connect your downpipe this way however, we would recommend that you also consider installing gutter guards to prevent leaves and debris falling into the downpipe. Without a grid and gully trap to catch this material at the discharge end, any potential blockages in the downpipe become more problematic to clear.
Should I connect my downpipe to a water butt?
The simple answer to this is, yes. If you can afford to add in the cost of a water butt and rainwater diverter kit to your guttering shopping list, we would definitely recommend doing so. Collecting the water falling from your roof and storing it for use in watering your garden is a great way to save money on your water bills and help the environment. You could also consider installing a full rainwater harvesting system to really put your rainwater to good use. Check out our knowledge section on Rainwater Harvesting for more information about this.
What type of screws will I need to attach my guttering?
That will depend on the type of fixing you use and what kind of surface it is being fixed to - always follow the manufacturer’s advice on this. Generally speaking though, for our range of Floplast guttering, you should be safe to use 25mm x 5mm non-ferrous round head screws
For 2-hole fixings, and 40mm x 5mm non-ferrous round head screws for 1 hole fixings. You can also use countersunk screws, but extra care must be taken during installation to ensure you do not overtighten them (especially when using power tools).
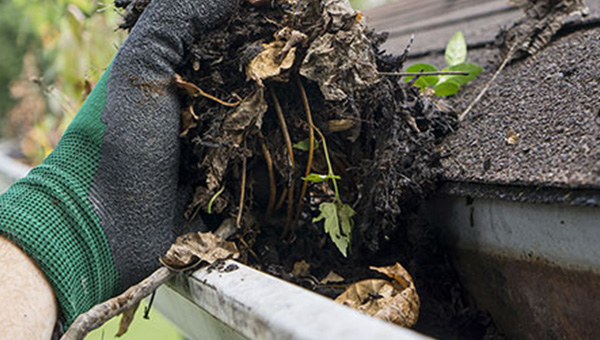
Do I need to install leaf guards in my gutters?
Do you need them? No. Should you want them? Yes. Leaf guards (gutter guards) help to prevent leaves and other debris from collecting in your gutters and either forming blockages or reducing the capacity flow. Check out our FlowGuard and GutterBrush options from Floplast if you want to see how to best protect your gutters. Combine these with outlet balloons and drain guards to really help keep your guttering system free of blockages and running smoothly.
I share a gutter run with my neighbour, will this matter?
The answer to this really depends on two things; what type of gutters do your neighbours have and what type of gutters are you planning to install on your side of the building? While you may share a gutter run with your neighbours, if you live in a semi-detached or terrace house, there shouldn’t technically be any issue with you having a different style of guttering to them as long as the two systems can still be joined up with a suitable adaptor. Therein is where the difficulty lies, however, as not all guttering systems are compatible with each other. You will need to try and find out the size, profile and brand of your neighbours guttering and then compare it to the compatibility chart provided by most guttering manufacturers. Floplast offer the following connection table for their gutter systems:
Once you’ve given thought to all these questions and planned out everything you need to make up your new guttering system, it’s time to prepare for the installation.
Preparing for your new guttering installation
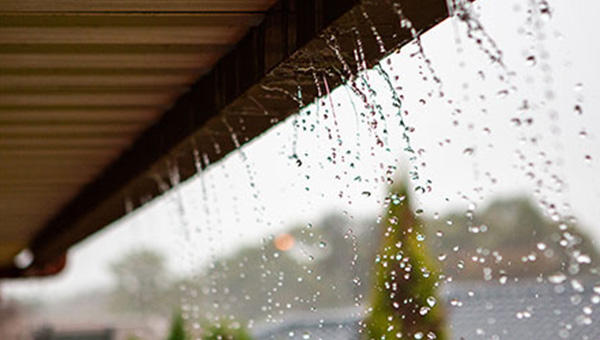
Installing a new gutter system is definitely a job you want to save for a nice sunny day - trying to put up guttering that is already channelling water off your roof and right on to you would be pretty miserable to say the least. However, given how fickle the weather can be, planning for that sunny day can be tricky. Your best bet, therefore, is to have everything you need prepared and ready to go when that nice day arrives. Of course, the main bulk of this will be all the parts and pieces of your planned system, which you can buy from your friendly neighbourhood civils and drainage experts…*cough, cough*. However, all that guttering won’t put itself up, so you’re also going to need some tools to get the job done.
What you will need
- Ladders - long enough to reach your roof.
- Drill - preferably a cordless one for ease of use (don’t forget to charge the battery(s) beforehand).
- Suitable drill bits (masonry bits will be needed for attaching brackets to the wall).
- Screwdriver/screwdriver bit for you drill (make sure it matches the head of your screws).
- Spirit level.
- Tape measure.
- Pencil.
- Plum bob and line set.
- Some string or brick line (long enough to span the longest stretch of your roof).
- Hacksaw.
- File or medium grade sandpaper.
- Silicone lubricant.
Always put safety first
In addition to the tools mentioned above, you’ll also want to make sure you have the following personal protective equipment:
Safety Goggles - Drilling and sawing plastic can produce sharp particles that can get in your eyes and cause irritation. Wind-blown dust and dirt off your roof can also get into your eyes and be distracting enough to cause a loss of balance while up your ladders. Don’t risk your eyesight or a nasty fall. Get yourself some safety glasses/goggles and keep them one throughout the installation process.
Protective Gloves - This is especially important if you are having to remove any old guttering that might have sharp edges etc.
Aside from PPE, there are other safety aspects that should be given consideration. When having to work at height, the safest thing to do is to hire some scaffolding that removes the need to constantly climb up and down a set of ladders. However, for many of us, hiring a load of scaffolding and waiting for it to be installed, and then taken down again after use, for, what will likely only be, a one-day job won’t be all that appealing; at least not if you have a trusty set of ladders, that have served you well up to now, and a decent head for heights.
Working from ladders can be quite dangerous though, especially if you don’t know the safe way to use them. Even if you’ve been using ladders to clean your gutters and windows for most of your adult life, we’d still recommend refreshing your ladder safety knowledge by at least glancing over the following set of instructions:
- Before using your ladders you should always give them a visual inspection to check for dents, splits or cracks, loose joints or locking mechanisms, and anti-slip feet worn smooth, as all of these things could indicate that your ladders are no longer safe for use and need replacing. Don’t put it off if this is the case. Don’t risk getting “one more use” out of them before investing in a new set, as even the slightest accident involving ladders can cause serious injury.
- If at all possible, avoid working alone when ladders are involved. You ideally want someone with you to hold the base of the ladders and make sure it stays steady and secure while you’re up there. If that isn’t possible though, take extra care to make sure your ladders are well braced against slipping out from under you.
- When positioning your ladder, make sure it is feet are on firm, flat ground and not tilted to either side.
- If using an extension ladder, make sure that at least three rungs overlap to give it good stability.
- Place your ladder up against the wall at an angle of around 4:1 (i.e. for every 4 metres of height, the base of the ladder should be 1 metre away from the wall).
- Do not rest your ladders up against your guttering or the edge of your roof, as this can be dangerous and/or cause damage. If the length of your ladders prevent you from resting them safely against the wall beneath your guttering, consider investing in a metal stand-off that hooks on to the top of the ladder to hold securely away from the wall.
- When working on your ladders, do not overstretch yourself more than an arm’s length to either side, as this will unbalance your weight. If something is out of reach, climb down the ladder and safely reposition it closer to where you need to be.
How to remove your old guttering
If you are replacing an existing guttering system, you are of course going to need to dismantle the old one before you can install the new one. This should be relatively simple to do, destruction generally being easier than construction after all, but it will depend on the type of guttering you are removing.
Removing plastic guttering
Taking down old plastic guttering should just be a case of unclipping each gutter length from its brackets, carefully lowering it to the ground, and then unscrewing the brackets and removing them as well. Once the gutter outlet has been removed, you can then start unscrewing the down pipe clips and removing the downpipe section by section.
Top Tip: if the old gutter lengths are too long and unwieldy to handle safely by yourself, consider cutting them into smaller lengths with a hacksaw before unclipping them. This should make them easier to handle and dispose of too.
Removing cast iron and other metal guttering
Some metal gutters can be a lot trickier to remove due to their weight and more rigid structure; essentially old cast iron gutters which are incredibly heavy and can have sharp edges. Removing these types of gutters is definitely a two-person job. Here are a couple of tips to help you do it as safely as possible:
- Before trying to remove any part of the guttering, hammer some large nails into the fascia board beneath each section of the gutter to hold them in place while you dismantle the joints etc. This will help avoid any potentially dangerous accidents caused by the gutters making a sudden, uncontrolled brake for the ground.
- If the guttering is really old, it might have bolts joining it together which are probably rusted tight. Cutting through them with a hacksaw and then tapping them out with a nail punch and hammer is probably the best way to deal with them.
- To safely lower the gutter lengths to the ground, tie a length of rope around each end, have you and your demolitions partner positioned either side of it and use the ropes to carefully lower the gutter down to the ground between you.
- Remove the downpipe one section at a time, carefully lowering each pipe length down to your partner and remember to remove any pipe nails that may have been used to secure them to the wall (you may need a crowbar for this if they are rusted in).
- Finally, use an appropriate filler to repair any holes in the walls and fascia board, and consider repainting or re-staining the fascia before installing your new system.
With all that done, and all your planning and preparations completed, pray to the sun for a nice day and get ready to install your new guttering. And that brings us to the end of this article. Don’t worry, we aren’t abandoning you in your hour of need though. We have a dedicated step-by-step guttering installation guide ready to assist you whenever you need it.
Should you have any questions or need any further advice about your rainwater guttering though, check out our Guttering FAQ article or contact JDP today. Our technical team is always on hand to help with all your drainage needs.