Installing new guttering may seem a little daunting at first, but, with the right help and proper planning, it’s a job that even a novice DIYer can successfully complete. In this handy step-by-step guide, we’ll walk you through everything you need to do to install your guttering from start to finish.
Since we specialise in plastic guttering here at JDP, stocking an extensive range of Floplast gutters and downpipes, this guide will primarily focus on how to install a plastic guttering system. However, most of the principles involved are the same regardless of what material your gutters are made from, but you should always prioritise the installation advice given by the manufacturer over that given in a guide such as this.
If you haven’t already done so, we highly recommend having a read through our guide to planning and preparing for your gutter installation. There you will find a comprehensive explanation of how best to plan out what parts you need, get answers to many common installation questions, and see advice on what tools and safety equipment you will need. Proper planning and preparation is the key to making the job go as smoothly as possible. Once you feel confident that you are as prepared as you can be, it’s time to get the installation underway.
Installing a new guttering system
Before you go racing up your ladders (at a safety conscious speed), there is one important aspect of the installation that needs to be addressed...are you going to install your gutters with a fall? If you have already read through our guide to choosing the right sized gutters for your house, you should be familiar with the concept of installing your gutters with a fall, and the impact it can have on the flow capacity of your system. If not, here’s a quick explanation to bring you up to speed.
Gutter fall and flow - what you need to know
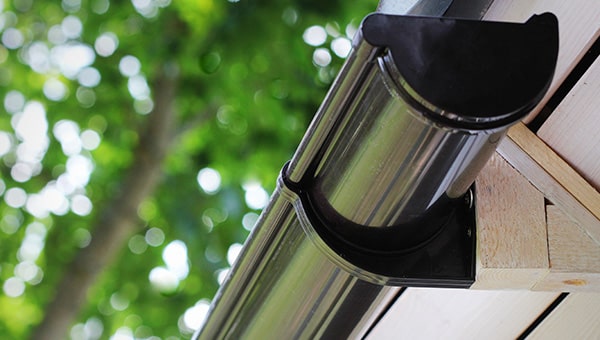
The primary goal of your guttering is to catch the rain running off your roof and prevent it from falling to the ground like a curtain of water. However, unless it can channel that water away quickly for discharge into a drain, soakaway, or rainwater harvesting system, your guttering is going to fail in that task. That is, of course, where the downpipe comes in. But how do you ensure that the rainwater runs into the downpipe and doesn’t just sit stagnant in the gutter? By installing your gutters with a gentle slope down towards it, that’s how.
Now, you can install your guttering perfectly level with the edge of your roof, and it will still work, but the recommended maximum flow capacity and effective roof area of the systems you can choose from will be quite substantially reduced. This could force you into requiring a larger, and more expensive, style of guttering over what you could get if you install it with a fall.
For the guttering systems we supply here at JDP, we recommend fitting them with a gradient of 1:350, which equates to roughly a 3mm (0.1inch) drop for every 1 metre/1000mm (3.3ft) length of your gutter run - this is your fall per metre figure. So, for an 8m (26ft) stretch of guttering, your outlet to the downpipe should be 24mm (0.9inch) lower than the opposite end of the gutter. Why do we recommend a 1:350 gradient? Because it provides just enough of a slope in the gutter run to efficiently channel the water away. Would a steeper one not be even more efficient though? No, not necessarily. The problem with installing a gradient greater than 1:350 is that it can cause there to be an excessive gap between the lowest edge of the roof and the top of the gutter. If the gap between the roof and the gutter is too big, chances are that the water running off your roof is going to miss the gutter entirely. Stick to a fall of 3mm per meter and you’ll not go wrong with your gutter installation.
When installing your outlet piece, it should be no lower than 50mm (2inch) from the roof. If you want to keep the maths to a minimum, an easy solution to ensuring you have a good fall is to install your outlet at that 50mm maximum drop and then work backwards to the opposite end of your gutter run, lifting the height of each bracket by 3mm as you go (assuming you are spacing them 1000mm apart). To make our installation guide easier to follow, we will use this method in our instructions.
Calculation advice: If you are installing your brackets closer together than the standard 1000mm (to help support your gutters against faster water flows off steeper roofs or the weight of heavy snowfall), the fall calculation is actually pretty simple to work out. The 1:350 gradient calculates as 1000/350 which equals 2.86mm (which we round up to 3mm to make it easier to measure). If you are using a different measurement for your spacing, all you have to do is replace the 1000 in our calculation with your measurement in mm. For example:
- If you are placing your brackets 600mm apart, the calculation would be 600/350 which equals 1.71mm (round up to 2mm for easier measurements).
- If you are placing them at 400mm apart, the calculation would be 400/350 which equals 1.14mm (round down to 1mm for easier measurements).
Like we said earlier, it isn’t essential to install with a fall, but it is something we highly recommend and, as such, it will be part of our step-by-step guide going forward.
How to fit new gutters
Okay, so, you’ve bought all your guttering parts and pieces, lined them all up in an obsessively neat fashion on the ground (no...just us?), and gathered together all the tools you will need. Now you just need to know where to start. Well, we hear the beginning is a very good place, so let’s start there with Step 1.
Step 1
The first thing you need to do is to establish the position of the outlet that will connect to the downpipe (whether that be a running or stopend outlet). Alright, so this isn’t exactly the beginning of our guttering, but it should always be the beginning of your installation, as it is one of the most important pieces to get positioned right. Here’s how to do it:
- Hold a plumb line against the fascia at the planned discharge point and let it hang down.
- Position so that it hangs directly over the drain your downpipe will discharge into.
- Mark the position on the fascia with a pencil.
Step 2
Next, you need to fix the outlet in place as this will help you establish the positioning of the rest of the system.
- Grab your outlet piece and hold it in place over the mark you just made.
- Position it at the level required by your fall calculation as described above.
- Make sure that this is no more than 50mm below the level of the roof!
- Use a pencil to mark the positioning of its screw holes onto the fascia.
- Use your drill to make small pilot holes at these points.
- Screw the outlet into place using the screws recommended by the manufacturer.
Top Tip: If you are using a cordless screwdriver, or a drill with a screw bit, try dropping the speed/power setting as low as it will go to help you avoid over-tightening the screws.
Step 3
With your outlet in place, you now need to fix your first fascia bracket at the opposite end of the run.
- Measure 100mm (3.9inch) in from the end of the fascia.
- Measure the distance between that mark and the outlet piece.
- Multiply the number of metres by your fall per meter figure and mark the resultant drop.
- Hold your bracket in place so that the fall mark lines up with where the gutter will sit in it.
- Use a pencil to mark the positioning of its screw holes onto the fascia.
- Use your drill to make small pilot holes at these points.
- Screw the bracket into place using the screws recommended by the manufacturer.
For example, if you have a stopend outlet fitted, 50mm below the level of the roof tiles at one end of the run, and the distance between it and the mark you made 100mm in from the opposite end of the fascia equals 8 metres, you would work out the height of the bracket as follows:
- 8m x 3mm per metre
- 8 x 3 = 24
Bracket should sit 24mm higher up the fascia than the outlet.
- Outlet = 50mm
- 50 - 24 = 26
Bracket should hold your guttering 26mm below the edge of your roof.
Note: If you are using a running outlet that is positioned more centrally along the run, you will need to repeat this process at both ends of your roof to ensure that all the gutters flow towards the outlet with the correct fall.
What if you don’t have a fascia board?
For properties without you will need either universal rise and fall brackets, which set in between your brickwork, or rafter brackets, which fix straight onto the side or top of a rafter. Both of these fixings give you a sturdy anchor point to fix your fascia brackets to and should be measured up for fitting using the same method described above.
Step 4
Once your first fascia bracket is in place, working out the height for all the brackets in the run becomes much easier with a low-tech solution in the form of some string.
- Tie on end of a length of string, or brick-line, to the base of the bracket.
- Run the string along the fascia board and tie the other end on to the outlet.
- Make sure the string between the two fixings is pulled tight before tying it off.
- Use a spirit level to check that there is indeed a fall towards the outlet.
Assuming everything looks right, you can now start installing the rest of your brackets.
Step 5
Working from the first bracket down towards the outlet, it’s a good idea to measure up the position of all the other brackets before installing any more. Remember, no more than 1000mm (39.4inch) should be left between your brackets (less if you have a steep roof or heavy snowfall in the winter) and no more than 150mm (5.9inch) should be left between a bracket and any join, bend or stopend.
- Mark the position of your brackets on the fascia.
- Position a bracket against each spacing mark.
- Line it up so the string is just touching the inside support edge (where the gutter will sit).
- Use a pencil to mark the positioning of its screw holes onto the fascia.
Note: If you use bends to continue the gutter run around the sides of your roof, just remember that you will need to repeat the previous steps for any additional length of gutter that runs to an outlet.
Step 6
Once you have marked up where all your brackets need to be, go back along the line and install them.
- Use your drill to make small pilot holes where your screws will go.
- Screw each bracket into place using the screws recommended by the manufacturer.
- Be careful not to over-tighten the screws.
- Remove the string guideline when finished.
Step 7
With all the brackets in place, you can now start fitting the lengths of gutter, starting at the outlet and working back. It’s helpful at this point to use silicone lubricant on the seals found in the outlet and any union brackets you plan to use, as this will help you fit the gutters without needing to apply too much pressure. The lubricant will also help prevent possible leaks that could be caused by expansion and contraction of the material.
- Apply lubricant to seals.
- Carefully lift gutter length into place and rest on the brackets.
- Fit the gutter using a “back to front” method on each bracket:
- Tilt the gutter so that the back edge slots under the back clip of the support bracket.
- Gently push down on the front edge of the gutter until it snaps under the front clip.
Step 8
Once the first length is all clipped into place and sitting nicely, you’ll next need to fit a union bracket to join up the next length of gutter.
- Make sure lubricant has been applied to the seals.
- Fit the union bracket to the end of the gutter - use insertion depth marks for guidance.
- Screw the bracket into the fascia board.
- Carefully lift the next gutter length into place and rest on the brackets.
- Apply gentle pressure to connect the gutter to the union bracket - observe insertion depth marks.
- Continue using the “back to front” method to clip the gutter into the fascia brackets.
Repeat this step for any additional lengths of gutter you have.
Step 9
Unless you are incredibly lucky with the length of your roof, you will mostly likely need to either cut the end off your last length or cut a spare length to size to finish your run at the end of the roof. Fortunately, at least if you have chosen plastic guttering, this is easy to do with a standard hacksaw.
- Measure the length of gutter you will need to either cut off or add to the run.
- Remember that the gutter needs to extend out to the end of the roof, not just the end of the fascia board.
- Cut to size with a hacksaw.
- Fit an external stopend to finish the gutter run.
If your gutter runs around the edge of your building, you will of course need to install a bend instead of a stopend here. The methods used thus far can be repeated for any additional fixings or lengths you need to install. Just remember to fit the stopend to the last length of gutter to complete the run.
With your gutters all now up and properly fitted, it’s time to get the downpipe installed.
How to fit a new downpipe
Dark rain clouds starting to draw in on your previously sunny installation day? Don’t worry, you’re almost there. Compared to installing the gutters, the downpipe is easy. There’s no fall to worry about here, you just need a nice, straight run of pipe down from your outlet to the drain. Here’s how to do it:
Step 1
The first thing you need to do is to mark a 90-degree vertical line down the wall where the centre of the downpipe will be to help guide your installation.
- Grab your plumb line, tie the string to the outlet and let the bob drop down through the hole.
- Use your pencil to draw a vertical line on the wall where the string hangs.
- Using a spirit level can give you a hard edge to draw against and help ensure the line stays straight.
Top Tip: Struggling to keep the line straight as you draw? Try just making small marks at regular intervals on the wall in line with the string and then use the straight edge of your spirit level to join them up.
Step 2
Now you need to mark up the positions of your downpipe clips that will secure the pipe to the wall. Starting at the top of the wall, or at the point where your offset bend will be if you have an overhang (see below):
- Hold a downpipe clip centrally over the line you’ve drawn.
- Position it just below where the socket end of the downpipe will be.
- Use a pencil to mark the positioning of its screw holes onto the wall.
- Repeat this process to mark the position of every clip needed.
Downpipe clips should be spaced no more than 1.8m apart, but do bear in mind that you should always position one just under the socket of any pipe socket join you use to connect lengths of downpipe together. For this reason, it’s best not to pre-drill the holes you mark up just in case you need to reposition them as you connect the pipes.
How to connect a downpipe if your eaves overhang the wall
If your eaves overhang the wall, you will need to use either an adjustable offset bend or two standard offset bends to create a connection between the outlet and the downpipe. Connecting two offset bends together, using a short length of off-cut from your downpipe, allows you to create a sort of “S” shape or “swan neck” as it is more often called. Connect your bend to the outlet and then secure the other end to the wall with a downpipe clip, positioned directly below the bend, before connecting your downpipe - make sure you leave a 6mm gap at the top of the downpipe for expansion.
Step 3
Using a drill with an appropriate masonry drill bit (follow the size recommendation given by the guttering manufacturer), you can now drill the fixing holes you marked and fit them with appropriate wall plugs ready for attaching your pipe clips.
Note: If your system requires two or more lengths of downpipe to be joined together, we recommend pre-drilling only the holes of the pipe clips that will be used on the first length for now. This way, you don’t have to worry about having perfectly marked up the clips that secure the socket joints.
Step 4
Now you are ready to fit your first length of downpipe. Working from the outlet (or offset bend if you have one) down towards the drain:
- Make sure lubricant has been applied to any seals.
- Connect the downpipe to the outlet socket end up.
- Leave a 10mm gap between the end of the outlet and the bottom of the socket - this allows for expansion of the plastic in hot weather.
- Position your pipe clip just below the socket (where it should line up with the holes you drilled) and fix in place with the screws recommended by the manufacturer.
- Continue to fit the rest of the downpipe clips for this length.
If you need to join lengths of downpipe together, fit a joining socket between them and secure with a pipe clip below the socket. Make sure the rest of the pipe clips marked up for that length still line up, drill the holes, fit with wall plugs and then repeat Step 4 again. Do this for as many pipe lengths required to reach the bottom of your wall.
How to connect a water butt to your downpipe.
If you are planning on connecting a water butt up to your downpipe to harvest some of the rainwater running off your roof, now is the best time to get the connection kit fitted. If you have one already, follow the manufacturer’s instructions and install it as you go. Most kits are as easy to install as connecting up a socket joint, but they do require you to cut into the downpipe around 30mm below the level of where the top of the water butt will sit. Doing this as you install your new downpipe will be much easier than trying to install it on an existing one.
Step 5
Cut the last piece of downpipe to size so that it ends the run as required to discharge the water either directly into the drain or a gully/grid. If you need to direct the flow of water into a grid, install a downpipe shoe to the bottom of the pipe and secure it with a pipe clip below the socket joint.
Step 6
Pat yourself on the back for a job well done, clear up your tools, remove any excess pieces of off-cuts and then head inside to put your feet up, happy in the knowledge that your house is ready for whatever those rain clouds want to throw at it.
Now all you need to do is take good care of your new system and you should be able to enjoy many, many years of hassle-free gutter ownership. But don’t worry, we aren’t about to abandon you here to fend for yourself. We’ve written a DIY gutter maintenance guide that’s specifically designed to help you secure that hassle free gutter life.
If you would like more information about rainwater guttering, check out our useful Guttering FAQ article where we give answers to the most common guttering questions. Should require any further advice about your guttering installation though, do not hesitate to contact JDP today. Our technical team is always on hand to help with all of your drainage needs.