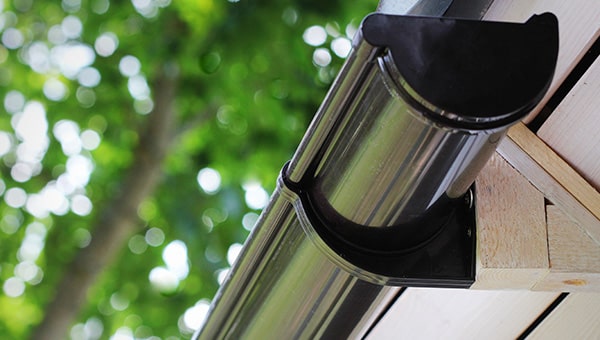
Cleaning domestic gutters and downpipes is a job that even the most novice of DIY enthusiasts should be able to handle. All it takes is a head for heights and a little know-how, and, while we can’t help with the working at heights bit, we can certainly make sure you have the right know-how.
In this guide, we’ll take a look at the tools you’ll need, offer advice on how to stay safe when working up ladders, and provide step-by-step instructions on how best to clean your rainwater guttering system.
Preparation is key
The first thing you need to do is plan ahead to avoid getting yourself into messy, or even dangerous, situations. Unless you have a bungalow or other single storey property, you’re going to be working at heights that cause you serious harm if you have an accident. Think about what you’ll need, think about the tools that you have, and plan the safest way to work along your gutters.
Aside from the all important ladder, there are a few other things you should really have for this job.
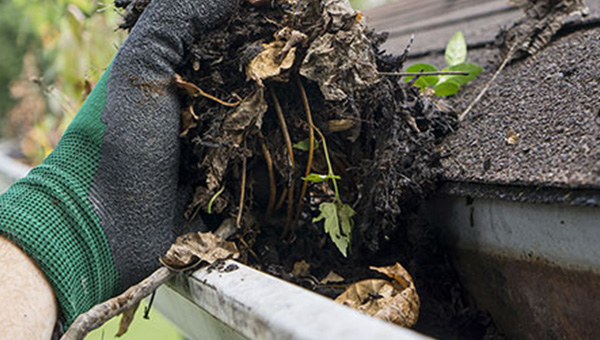
- Protective Gloves - Your hands are often the best tools at your disposal for scooping out the muck in your gutters, as they afford you more dexterity than any other cleaning implement you could use. However, depending on the material of your gutters, you could be dealing with rough edges, there’s likely to be stagnant sludge to scoop out, potentially thorns and other sharp debris, and there’s even the possibility of finding dead animals up there too. None of these are things you really want to be touching with your bare hands. Get a good set of garden gloves, or at least a pair of marigolds, to keep them safe while you work.
- A Trowel - If you aren’t all that keen on using your hands to clear out the gunk, even with gloves on, a small garden trowel can be used to scoop up the worst of it.
- A Bucket - While you could just scrape out the debris and let it fall to the ground (assuming there is no chance of it landing on an innocent passerby), if what you are scooping out is a wet, sludgy goop, it’s likely going to make a mess on the floor and splash up your walls. This then leads to more cleaning you have to do once done with the gutters. A far better, and safer, idea is to have something with you (be it a bucket or even just a plastic bag) to put the messy stuff into, and then dispose of it properly when you climb down the ladders.
- A Ladder Bucket Hook - If you do decide to take a bag or bucket up with you to collect the rubbish, you’ll ideally need some method of holding it that doesn’t tie up one of your hands. For ladder safety purposes, you should always have one hand free to grip the ladder and steady yourself. So, the safest option is to get a special hook that will let you hang the bucket from the ladder while you work.
- Tarpaulin - Even if you are using a bucket to collect all the stuff you scoop out of the gutters, some of the debris is still likely to fall down to the ground. Having a tarpaulin layed out under where you are working will make it easier to clean it all up afterwards.
- A Rake or Yard Brush - This isn’t essential, but it will allow you to perform an extra bit of cleaning that can help prevent future build ups of material in the gutters occurring as quickly (see Step 2 of our guide below).
- Hose Pipe - Being able to flush your gutters out with water is an important part of the cleaning process below. Pouring water out of a bucket into the gutter can work too, but having a hose pipe to use is the preferable method.
- A Nice Dry Day - While this will be somewhat out of your control, trying to plan your gutter maintenance around the weather is advisable. Cleaning them out on a dry day, when the wind isn’t blowing too strongly, will make for a far presenter and safer experience.
Ladder Safety Tip
Once you’ve got all your equipment ready and chosen the right day, the last stage of preparation involves ladder safety. Getting your ladder properly placed is critical to making the job as safe as it possibly can be. Here are some ladder safety tips to follow:
- Always perform a visual inspection of your ladders before each use. If you spot any dents, splits or cracks, loose joints or locking mechanisms, or anti-slip feet worn smooth, your ladders may no longer be safe for use and should be replaced.
- Avoid working alone if you can. Having someone to hold the base of the ladders and keep them steady makes the job a lot safer. If help isn’t available, take extra care to make sure your ladders are properly braced.
- When positioning your ladder, ensure its feet are on firm, level ground and not tilted to either side.
- DO NOT be tempted to place them on your lawn or in a soil border. You may think you have them safely wedged, but the soft ground could easily give way once you start climbing up and leave the ladders dangerously unbalanced.
- For extension ladders, overlap at least three rungs for good stability.
- Place the top of your ladder against the wall at an angle of around 4:1 (i.e. 1 metre out at the base for every 4 metres up).
- DO NOT rest your ladders up against your guttering or the edge of your roof. This can be very dangerous, as the ladders could easily slip or bounce against them and become unbalanced. It can also cause damage to your guttering, which really isn’t ideal when you’re up there trying to look after them in the first place.
- Make sure you are wearing sensible shoes with a good grip. DO NOT climb up any ladders wearing sandals or flip-flops...no matter how nice the weather is.
- If you can’t avoid leaning your ladders against the gutters, for whatever reason, we would strongly recommend investing in a ladder stay or stand-off. These devices attach to the top of your ladder and then rest against your wall, pushing your ladder out just enough to stop them touching the gutters while still keeping them stable.
- When up on your ladders, DO NOT overreach to either side to try and reach further along the gutters in an effort to save yourself some time. Doing so can cause the ladder to become unstable and you risk having a potentially serious fall. Keep your waist in between the rail of the ladder and reach only what you can from there. For anything beyond that, climb down your ladder, reposition it further along the gutter run, climb back up, and then continue your cleaning.
How to clean your gutters
With all your preparations made, your ladders positioned safely at one end of your gutter run, and your bucket securely in place, follow the steps below to give your gutters a good clean.
Note: It doesn’t really matter which end you start at, but we’d recommend starting with the downpipe end and working your way back along the gutter run, as this will save you some ladder work later on.
Step 1
Grab your rake or yard brush (we’ll explain why in a moment) and climb up your ladders until you reach a height from which you can safely observe what’s hiding in your gutters. Take your time and get yourself into a comfortable position before starting any work. You want to be able to safely reach the first section of guttering without having to overreach. If you feel you aren’t in the ideal position for this, climb back down and reposition your ladders. DO NOT put your safety at risk to save a bit of time.
Step 2
Start by cleaning any debris off your roof - this is why you brought the rake/yard brush Using your implement of choice, try to gather up any leaves, twigs or clumps of moss that are sitting around up there just waiting to become a future blockage in your gutters. Be careful not to overbalance yourself if using a long handled rake or brush though. Only gather up what is easily reachable. Remember our priority here is to clean the gutters. Giving the roof a bit of a brush will just help keep them clean for a bit longer.
Once you’ve gathered all that you can off the roof. It’s time to move on to the gutters. Depending on how much rubbish you have in your bucket at this stage, it may be worth climbing down and emptying it before you continue.
Step 3
Using either your hands (and a good pair of garden gloves) or a small garden trowel, scoop out any leaves, sediment, twigs, gravel or other debris currently inhabiting the section of gutter in front of you and put it in your bucket. If using a trowel, try not to be too heavy handed with your scooping as it could damage the gutter.
If there is a lot of debris up there and your bucket starts getting too full or heavy, do make sure that you climb down and empty it before continuing on.
Can you use a leaf blower to clean your gutters?
Technically, yes. However, while it may seem like a good idea to help clear out any dry material up in your gutters, you will run the risk of blowing some of it into the downpipe and potentially cause a blockage that wasn’t previously there. We recommend sticking to the manual method if possible, as the time the leaf blower saves you could become a “false economy” situation if you then end up having to spend longer unblocking your downpipe.
Step 4
Once you have cleared out as much of the gutter as you safely can, climb down the ladder and move it over to the next section. Repeat Steps 2 & 3 and then move on again. Keep repeating this process until you reach the end of your gutters, clearing out as much of the gunk and debris as you can.
Step 5
Now, if you followed our recommendation and started at the downpipe end, you should have your ladders positioned at the opposite end of the gutter from the downpipe. If this isn’t the case, you’ll need to move them back there for this next step.
Grabbing your hosepipe (or bucket of water if you don’t have one that will reach the roof), and ensuring the water is turned on, climb back up to the gutters and use it to flush any of the finer bits you missed down towards the downpipe. Depending on the water pressure you have, you may need to repeat this process in stages along the run to pick up some of the more stubborn sediment left over.
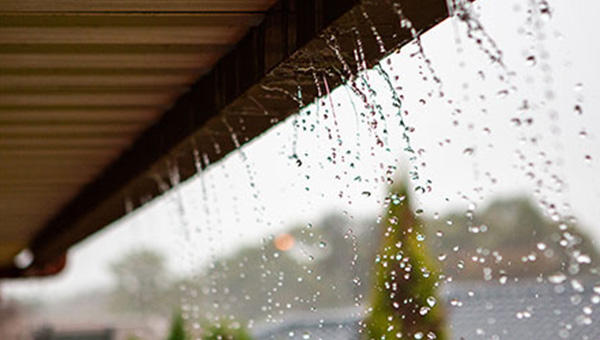
Let the water run for a minute or two to make sure it is flowing properly down the spout. This can help you determine whether you need to unblock the downpipe or not. Ideally you’ll want to have someone with you to stand at the bottom of the downpipe to watch or listen out (if your pipe is connected directly to the underground drain) for the water coming down. If flow is strong and constant, it’s a good sign that the downpipe is clear. If, on the other hand, the water is only trickling down, then you know there is a blockage somewhere that needs removing.
Note: If you are using a bucket to do the job, be careful not to overfill it as you’ll have to carry it up the ladder one handed. Try to create a steady flow of water by gently tipping it out if you can, and be prepared to have to repeat the process a few times to get the gutters clear.
Can you use a pressure washer to flush out your gutters?
Again, technically, the answer is yes...but we wouldn’t advise it. Depending on the type you have and the power behind its water jet, you could end up damaging your gutters (depending on the material they are made from) if the stream is too forceful.
You can get specialist gutter washers, that are essentially a long pole with a hose running through them, that can be used from the ground and provide a safe level of pressure if your hose isn’t really up to the task. These are also useful if you are doing the job solo, as it means you can better observe the water coming out the downpipe as you go. However, the downside is that you can’t see into the gutter while flushing it out, meaning that it can be easy to miss bits.
How to clean your downpipe
So, now that your gutters are all clean and free of potential blockage material, you need to turn your attention to your downpipe. The downpipe (also commonly referred to as a downspout, drain spout or leader) plays a vital role in directing the water from your gutters into your property's underground drainage. They can, however, be a bit more tricky to clean and unblock.
If the water you flushed your gutters out with seemed to flow down into the drain without any issue, then there is unlikely to be much you need to do here. Maybe just shove your hose pipe directly into it and let it run for a minute or two, just to help blast away any material that might be starting to build up.
Warning: If you found water pooling around the outlet end of your gutters before you started cleaning them, this is a clear sign that the blockage is in the downpipe. If your downpipe is connected directly to the underground drains, DO NOT try to flush the blockage or build-up out with the hose pipe as suggested above. This could potentially just push the blockage material down into the drain where it could become an even bigger problem for you to fix. If you have a downpipe that connects directly to the drain and you suspect there might be a blockage, follow the steps below to safely clear it out.
If you do have reason to suspect that your downpipe is blocked, and flushing it out with the hosepipe didn’t work, or you just want to be completely thorough in the cleaning of your system, here’s what you need to do:
Step 1
The bad news here is that the only sure fire way to clean out a blockage in a downpipe is to take it apart, dislodge the debris with a pole or sturdy stick, and then connect it all back together. The good news is that, depending on where the blockage is, you may not need to pull the whole downpipe off the wall.
Using a screwdriver (or something similar), slowly work your way up your ladders gently tapping the downpipe as you go. Where there are no blockages in the pipe, you should get a hollow sound in return. When that sound becomes a dull thud, you’ve found your blockage. If it is high up towards the gutters...commiserations, you will need to disconnect the whole downpipe to get at it. If, however, it is lower down, you may only need to remove a couple of sections to clear it out. Finding the blockage before you start can save you some work if you are lucky.
Step 2
Once you have located your blockage, use a screwdriver (or suitable power tool) to unscrew the downpipe clips and brackets from the wall and dismantle as much of the downpipe as is necessary.
Note: Due to the way the downpipe will have been installed, you will need to work from the ground up to dismantle it. As long as you work on one section at a time, only unscrewing the clips and brackets that hold that section in place, and carefully lower the pieces to the ground (ideally with someone there to help you), you shouldn’t have any problems. Just don’t be tempted to loosen all the clips and then start pulling apart the pipes, as it could all come falling down on top of you.
How do you unblock a downpipe that connects directly to the underground drainage?
If your downpipe runs straight into the ground, rather than ending above ground and discharging the water into a gully or grid, it is likely that it has been connected directly to the underground drainage pipe. If this is the case, the only way to easily get at the blockage in the downpipe is by cutting the pipe just above ground level so that you can then dismantle it as described above. If you have plastic guttering, this should be easy to do with a standard hacksaw. For other material types though, it might be worth calling in a professional to do the job.
Clean out the blockage as described in Step 3 below, re-attach the downpipe as described in Step 4, and then connect it back up to the piece sticking out of the ground using a suitable downpipe socket.
Step 3
Once you have the blocked section of downpipe safely on the ground, use your chosen poking device to dislodge. If the blockage was close to where two sections join together, it’s worth just checking the section you left on the wall as well, in case any of the blockage stayed up there, before connecting everything back up.
Step 4
Essentially, putting the downpipe back together is just a case of doing everything you did to dismantle it in reverse. Join the pipe section to the one before it, hold the pipe clip in place and screw back into the wall. However, here are a few tips to remember to ensure everything gets connected back up properly:
- Apply silicone lubricant to any seals in the disassembled pieces.
- Remember to connect each downpipe section socket end up.
- When joining sections together, leave a 10mm gap between the end of the pipe and the bottom of the socket to allow for expansion in hot weather.
Step 5
Unless you have an unusually long run of guttering, or a larger roof area that requires more drainage, you will probably only have one downpipe to clean out per gutter run. Regardless of how many you do have however, make sure you repeat these steps to check and clean all of them to ensure your guttering system is in tip-top shape.
Once your gutters and downpipes are all nice and clean, you can call it days work, pat yourself on the back and bask in the glow of a job well done. However, since your mind is already in the gutter (we had to make that joke at least once in here) why not think about what you could do to actually prevent blockages occuring in the future and give yourself some peace of mind between your maintenance periods. Check out our gutter maintenance guide for more on this.
If, after cleaning your gutters, you discover that there is still water escaping from them, it is likely you have a leak in the system. Worry not though, as we have also put together another handy guide on how to fix the most common guttering problems to help you out.
And that’s it for this article. Hopefully we’ve armed you with enough information to get your guttering nice and clean, but if you have any other questions, or need further advice about your rainwater guttering, do not hesitate to contact JDP today. Our technical team is always on hand to help with all of your drainage needs.